Setup guide
Learn how to set up IQM Model Context Protocol (MCP) with Claude or ChatGPT.
Overview
IQM MCP is an interface that allows AI models to access the data and functionality of the IQM platform apps. This guide covers the IQM MCP setup process for two AI assistants: Claude and ChatGPT.
Before you begin
Before you can use IQM MCP, you need an account on the IQM platform. If you do not have an account, contact IQM Support (support@iqm.com) or your IQM representative to get started.
At a minimum, you need an account with Claude or ChatGPT to use IQM MCP. If you do not have an account with either assistant, you can sign up for a free account with Claude or ChatGPT.
Setup
Claude setup
With Claude's custom connectors feature, you can connect to IQM MCP and use it directly in your Claude conversations.
For Team and Enterprise plans, only the Owner or Primary Owner can add a custom connector. If you are not the Owner or Primary Owner, contact your team administrator to add the IQM MCP connector for you.
See Claude's Get started with custom connectors using remote MCP documentation for more information.
Step 1: Add custom connector
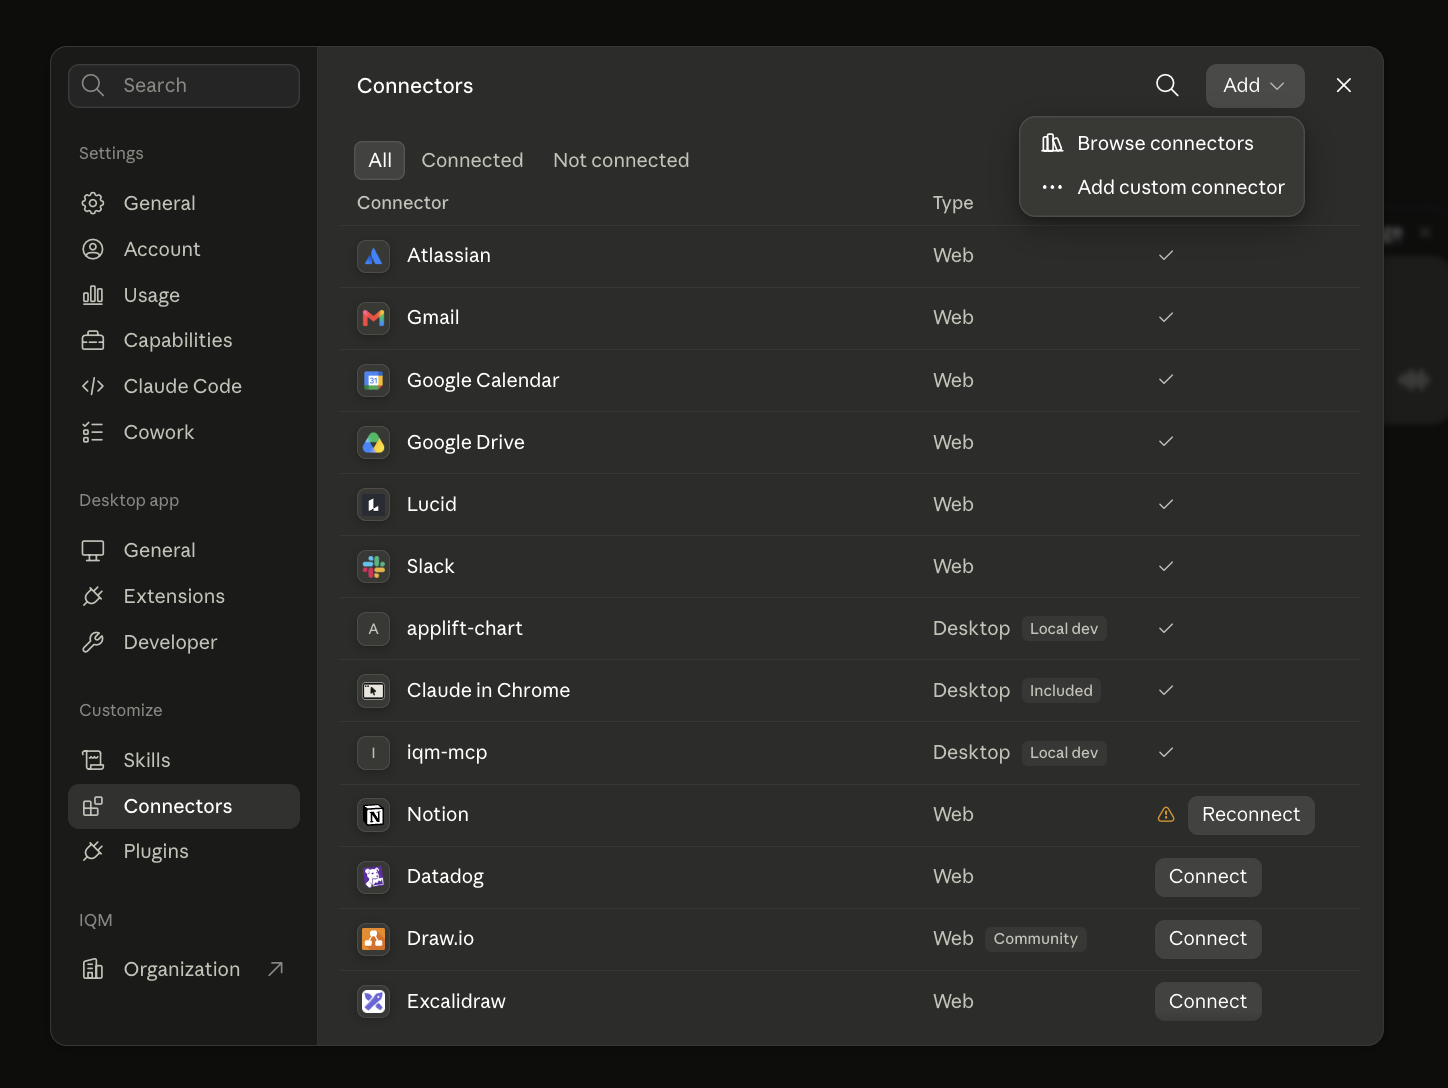
In your Claude window, navigate to Settings > Connectors > Add > Add custom connector. This opens the Add custom connector window.
Step 2: Enter MCP server URL
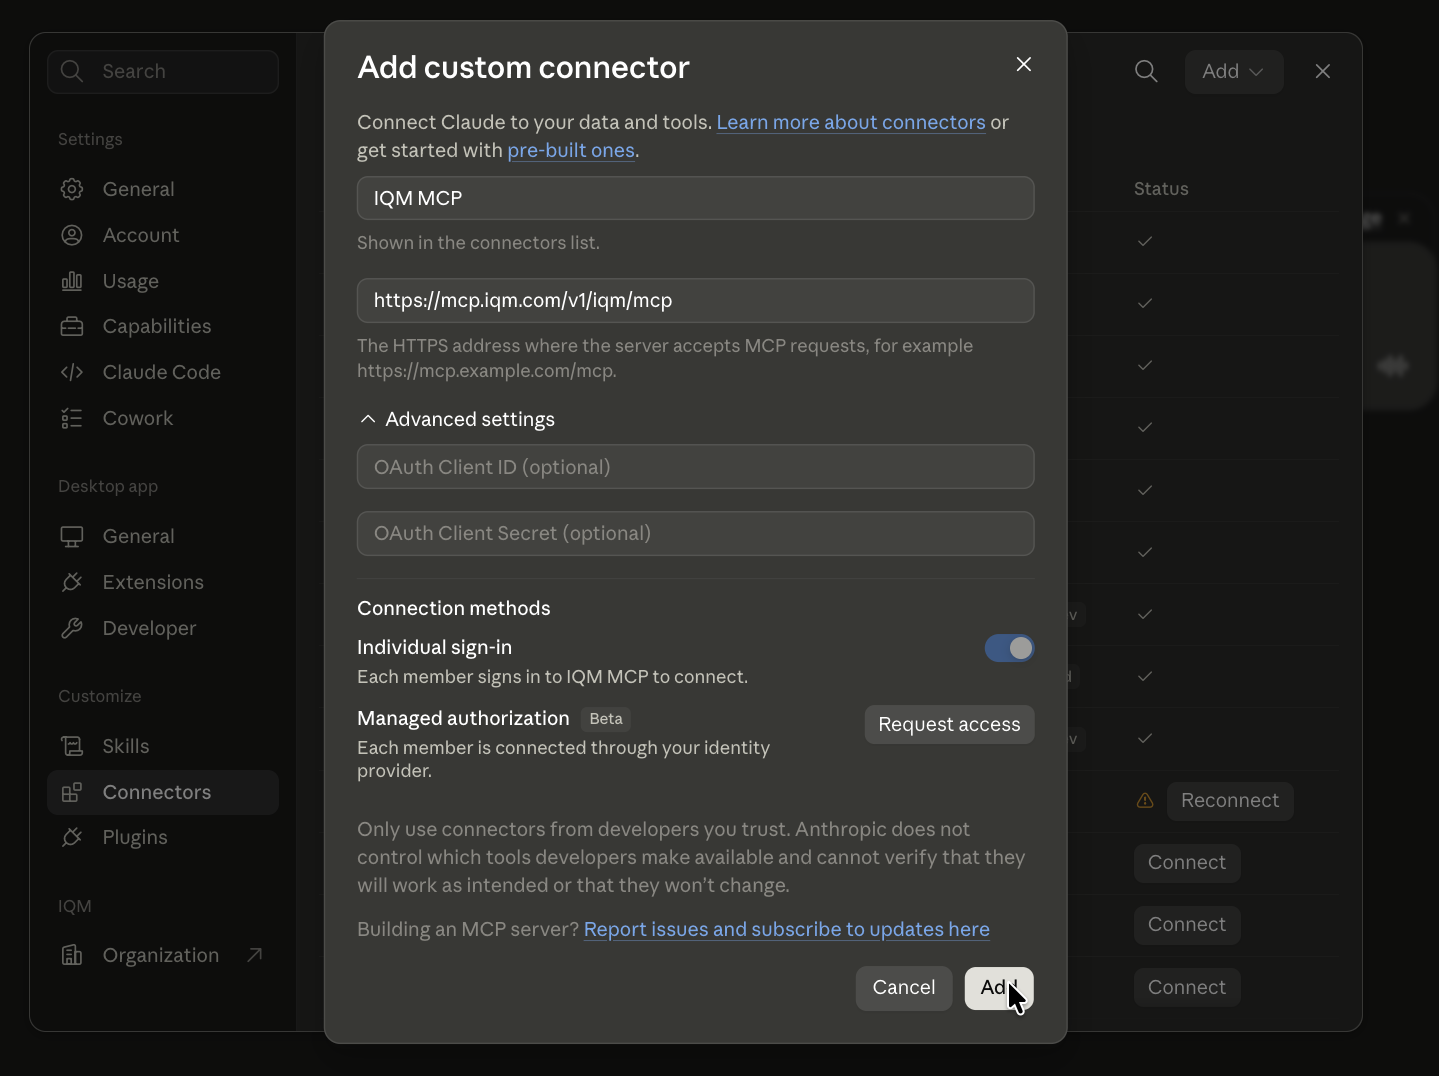
In the Add custom connector window, name the connector "IQM MCP" and enter the following server URL:
https://mcp.iqm.com/v1/iqm/mcp
Step 3: Connect
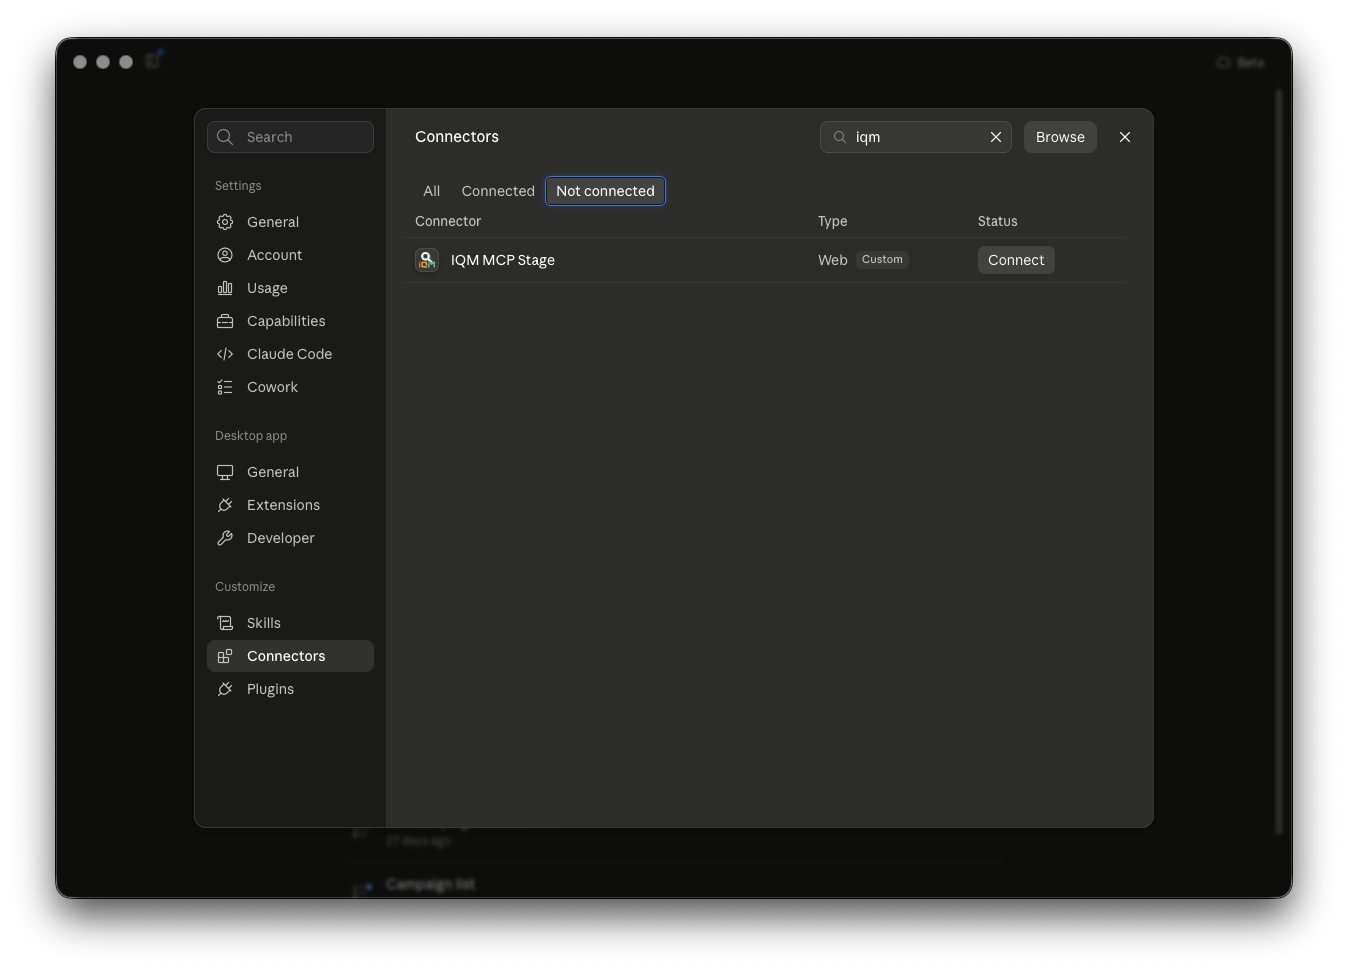
If added correctly, the IQM MCP connector appears in your list of connectors. If you don't see it, you can search for "IQM" in the search bar. To connect:
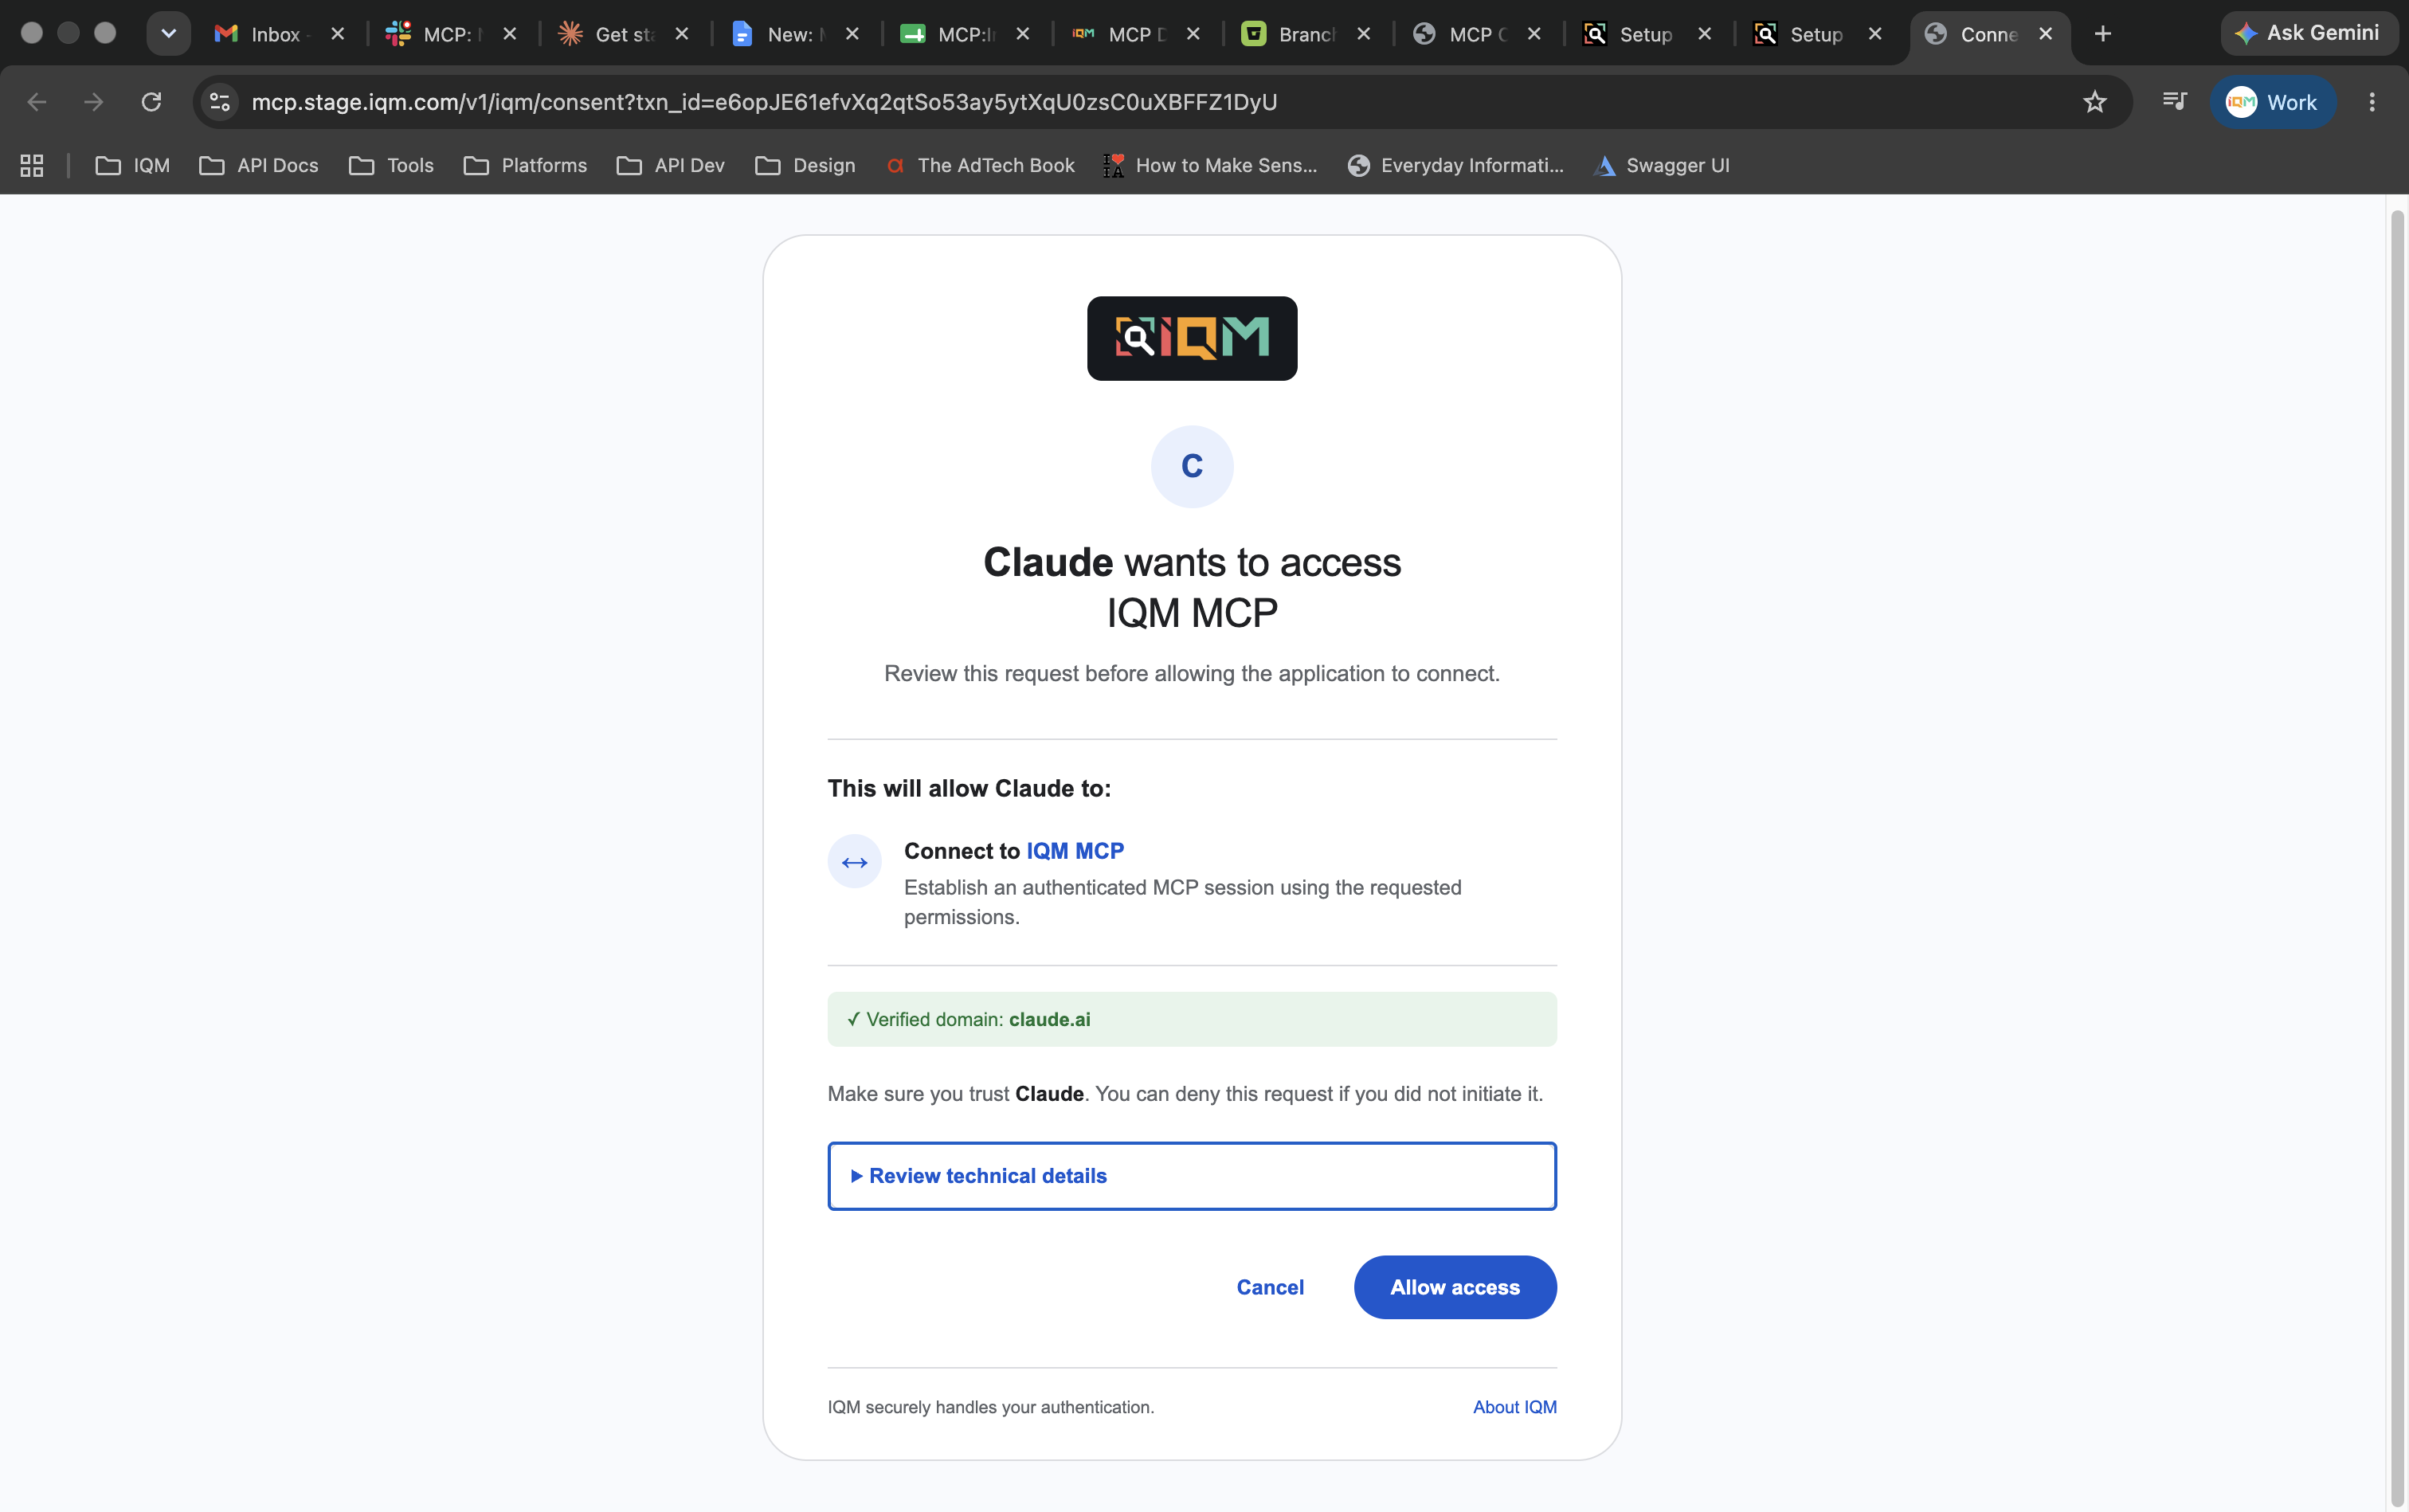
- Click Connect. A browser window opens, asking you to log in to the IQM platform.
- Authenticate your IQM account and click Allow access.
- You're redirected back to Claude, and the connector now shows as connected.
Step 4: Verify connection
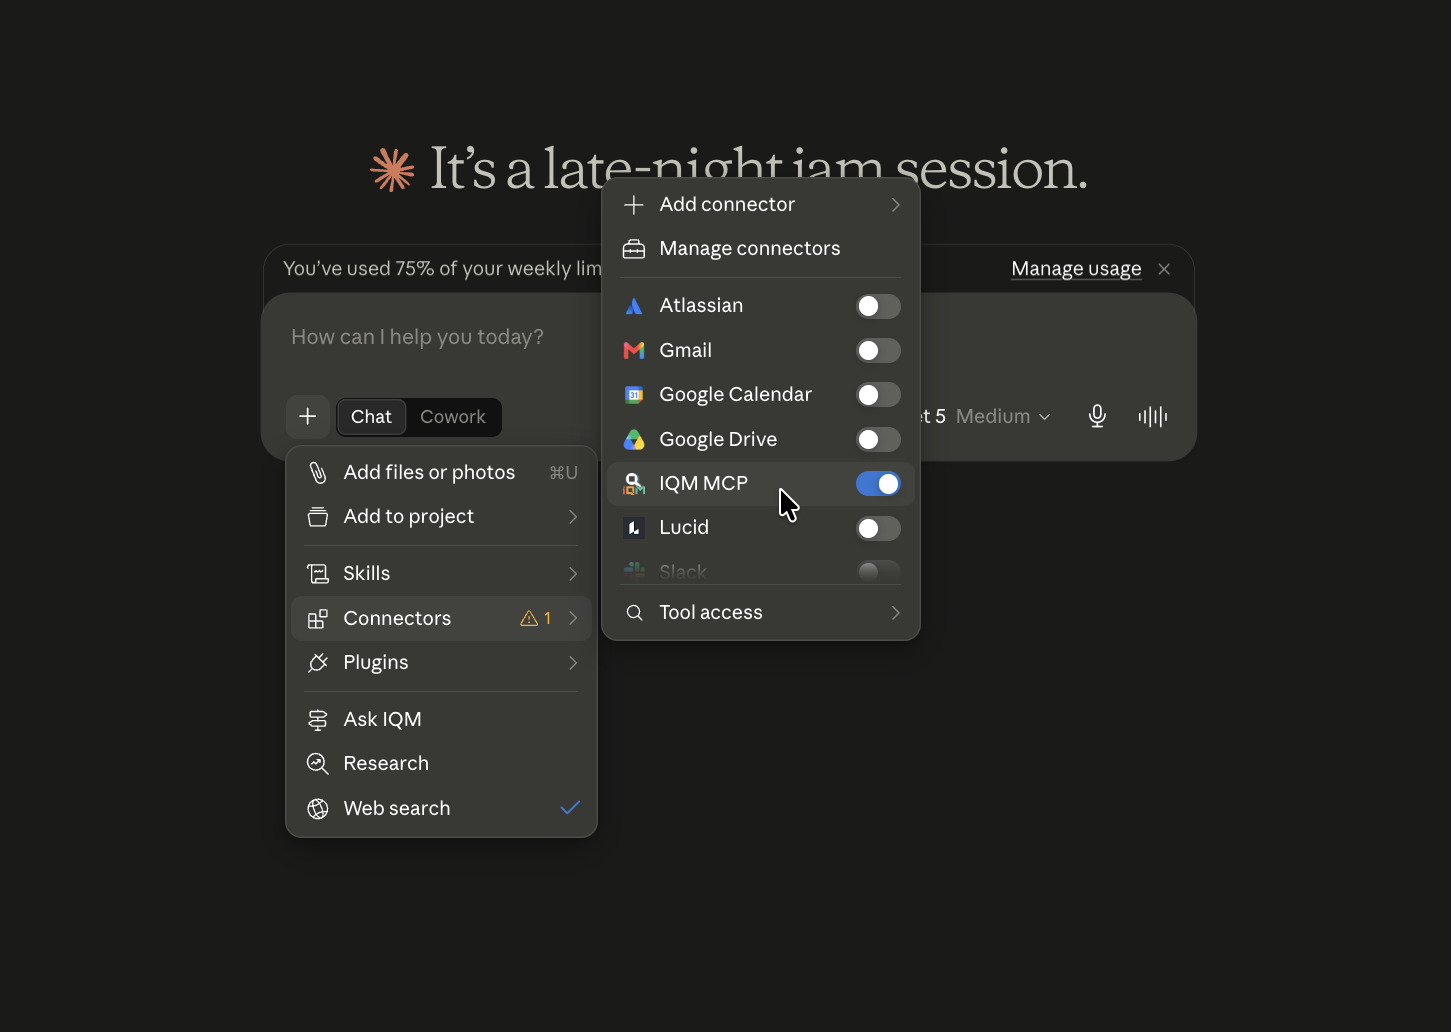
After authenticating with your IQM account, navigate to a new chat and + > Connectors to ensure the IQM MCP connector is enabled. You can now start using IQM MCP in your Claude conversations.
ChatGPT setup
With ChatGPT's developer mode, you can add IQM MCP as a custom plugin and use it directly in your ChatGPT conversations.
For Business, Enterprise, and Edu workspaces, a workspace admin may need to enable developer mode before you can add custom connectors. If you do not have admin access, contact your workspace admin to enable developer mode for you.
See OpenAI's Apps in ChatGPT documentation for more information.
Step 1: Enable developer mode
In your ChatGPT window:
- Navigate to Settings by clicking your account name in the bottom left corner.
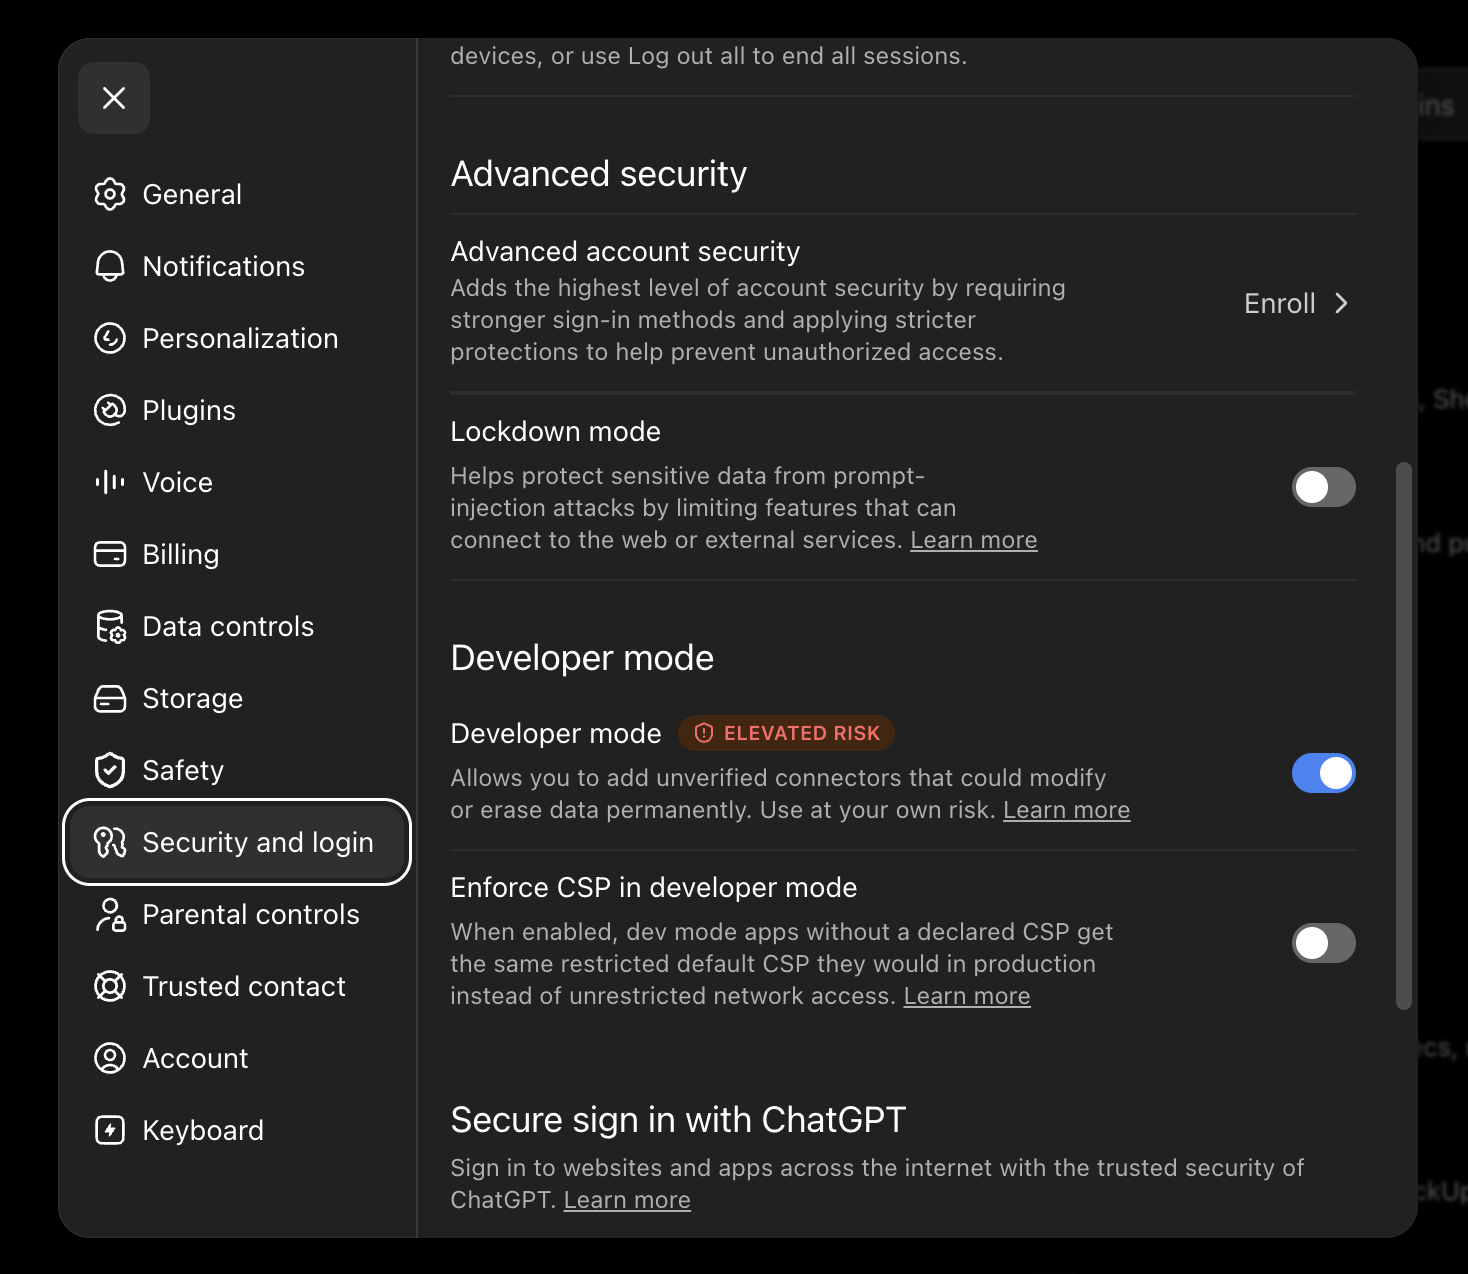
- In the Settings menu, navigate to Security and login > Developer mode and enable it. This lets you add plugins like IQM MCP.
Step 2: Add plugin
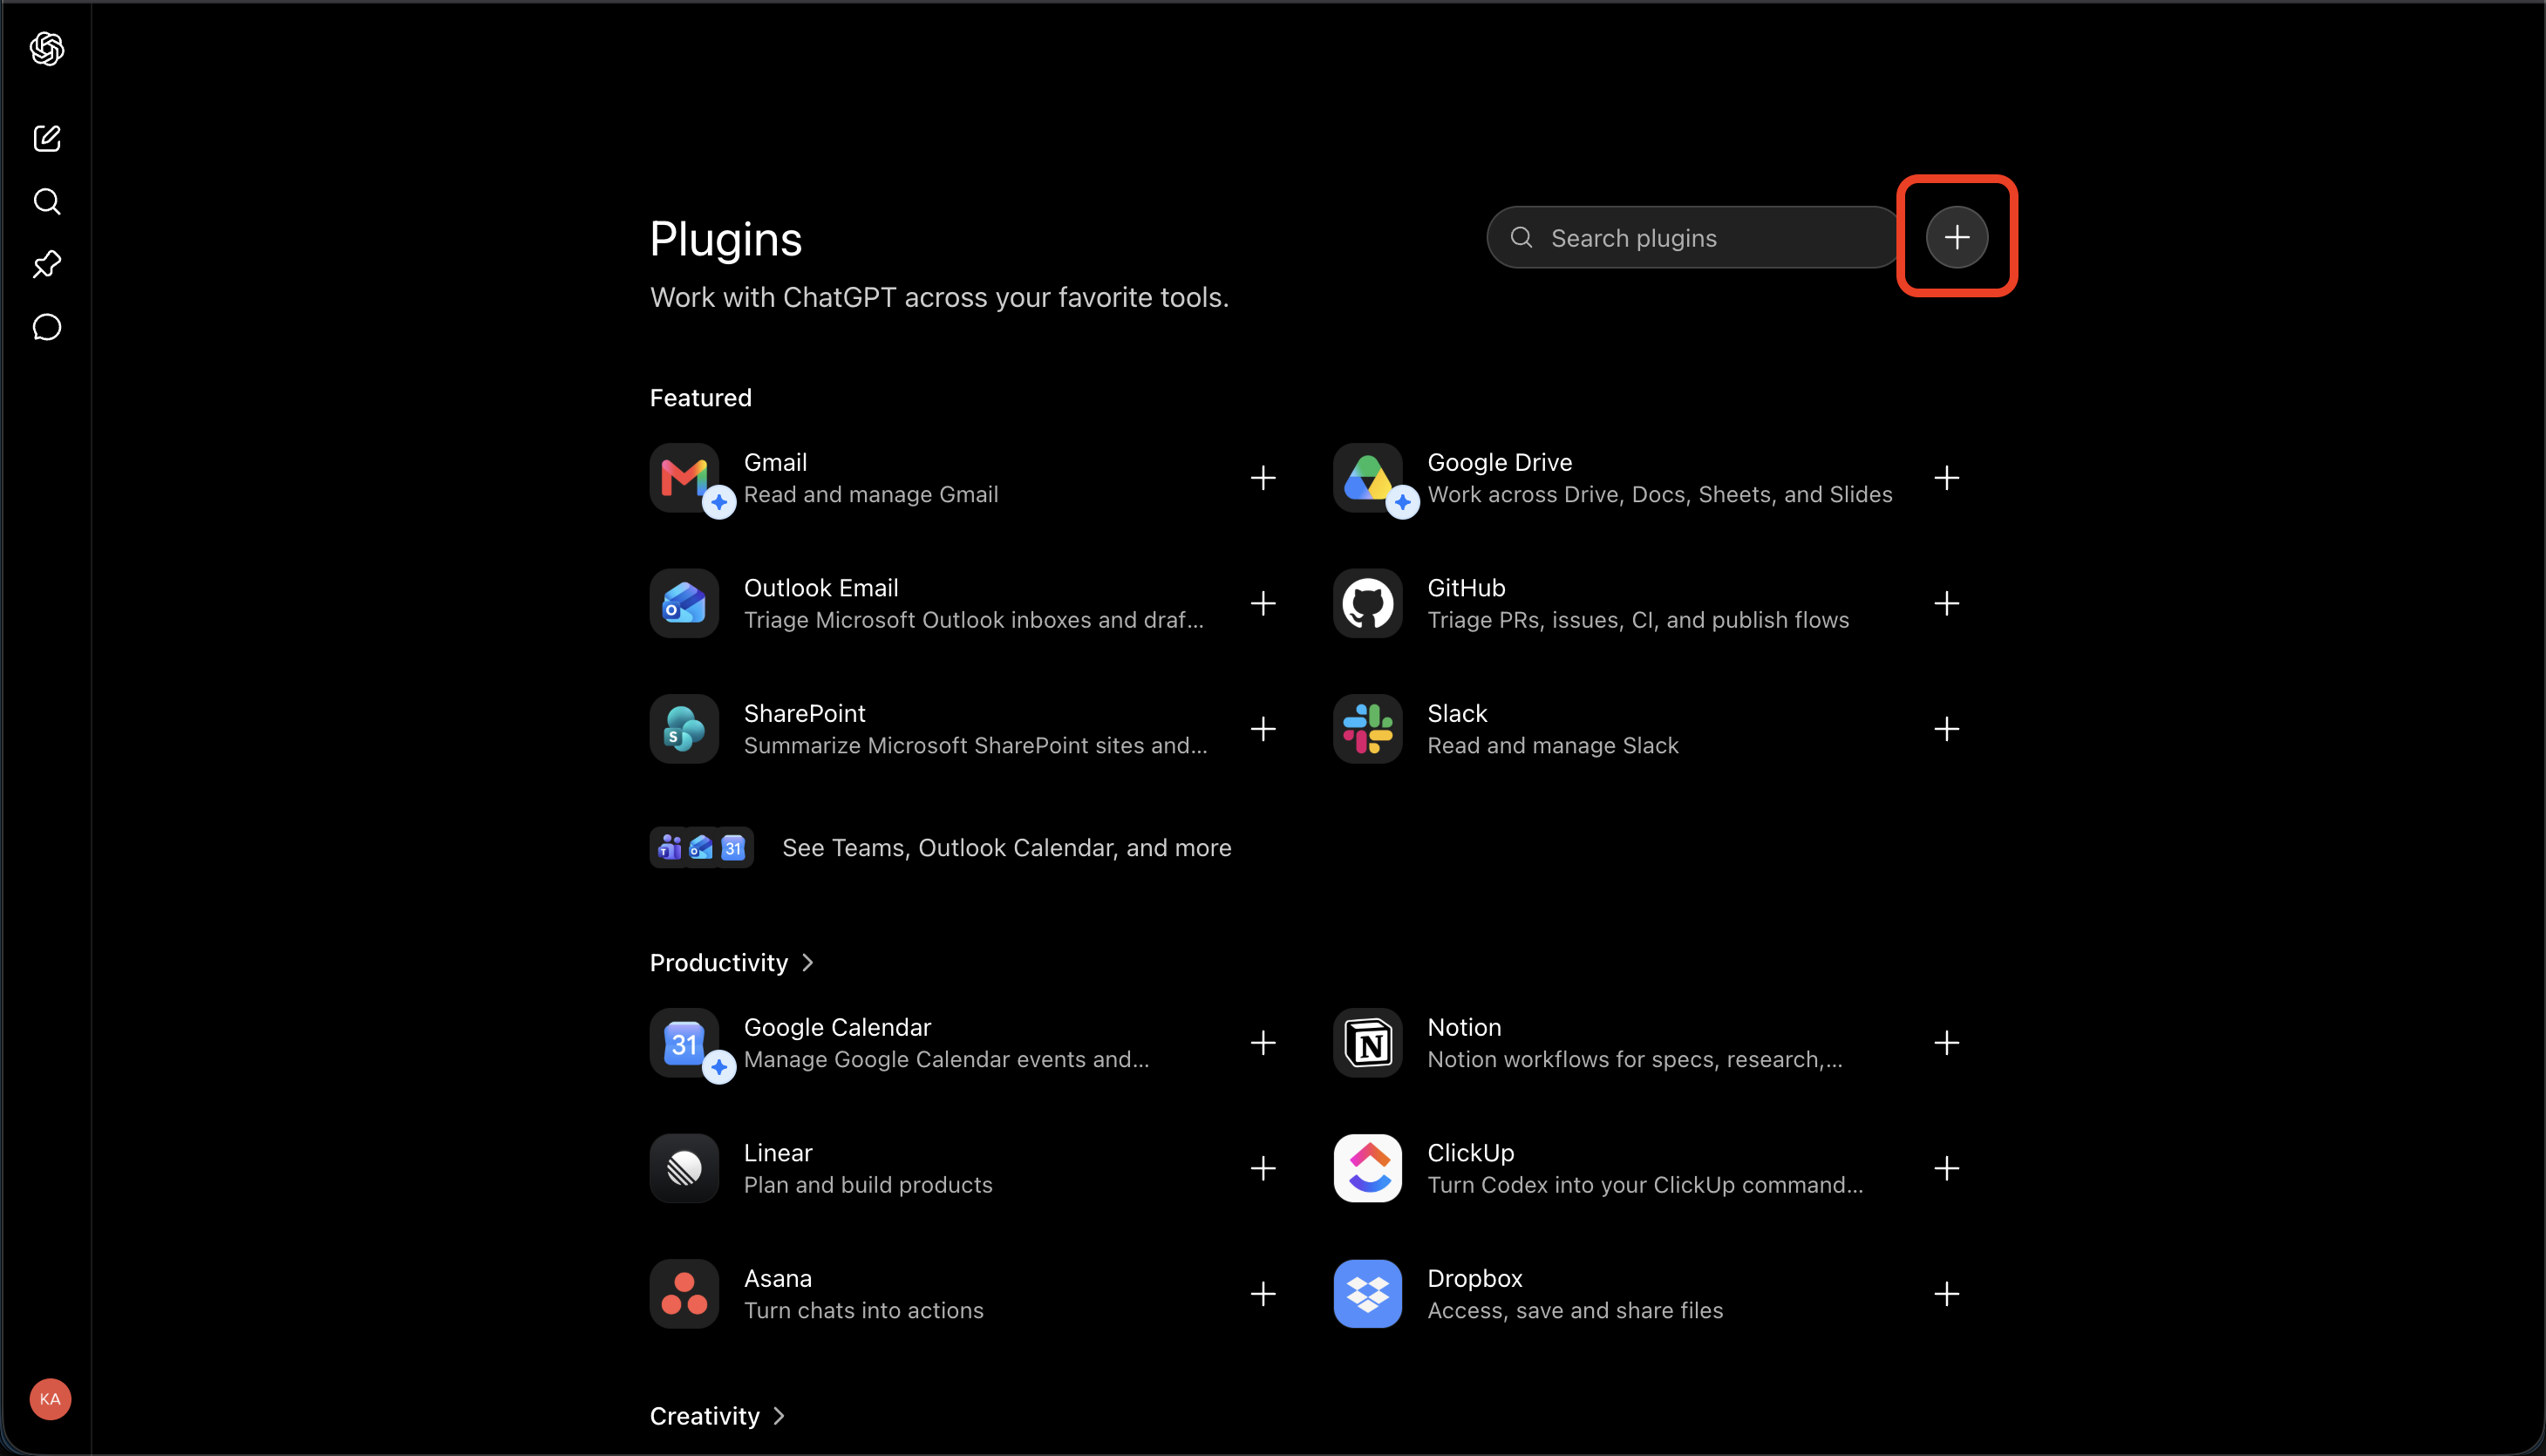
Once developer mode is enabled, navigate to Plugins in the sidebar. On the Plugins page, click the + button in the top right. This opens a window where you can enter the MCP server URL.
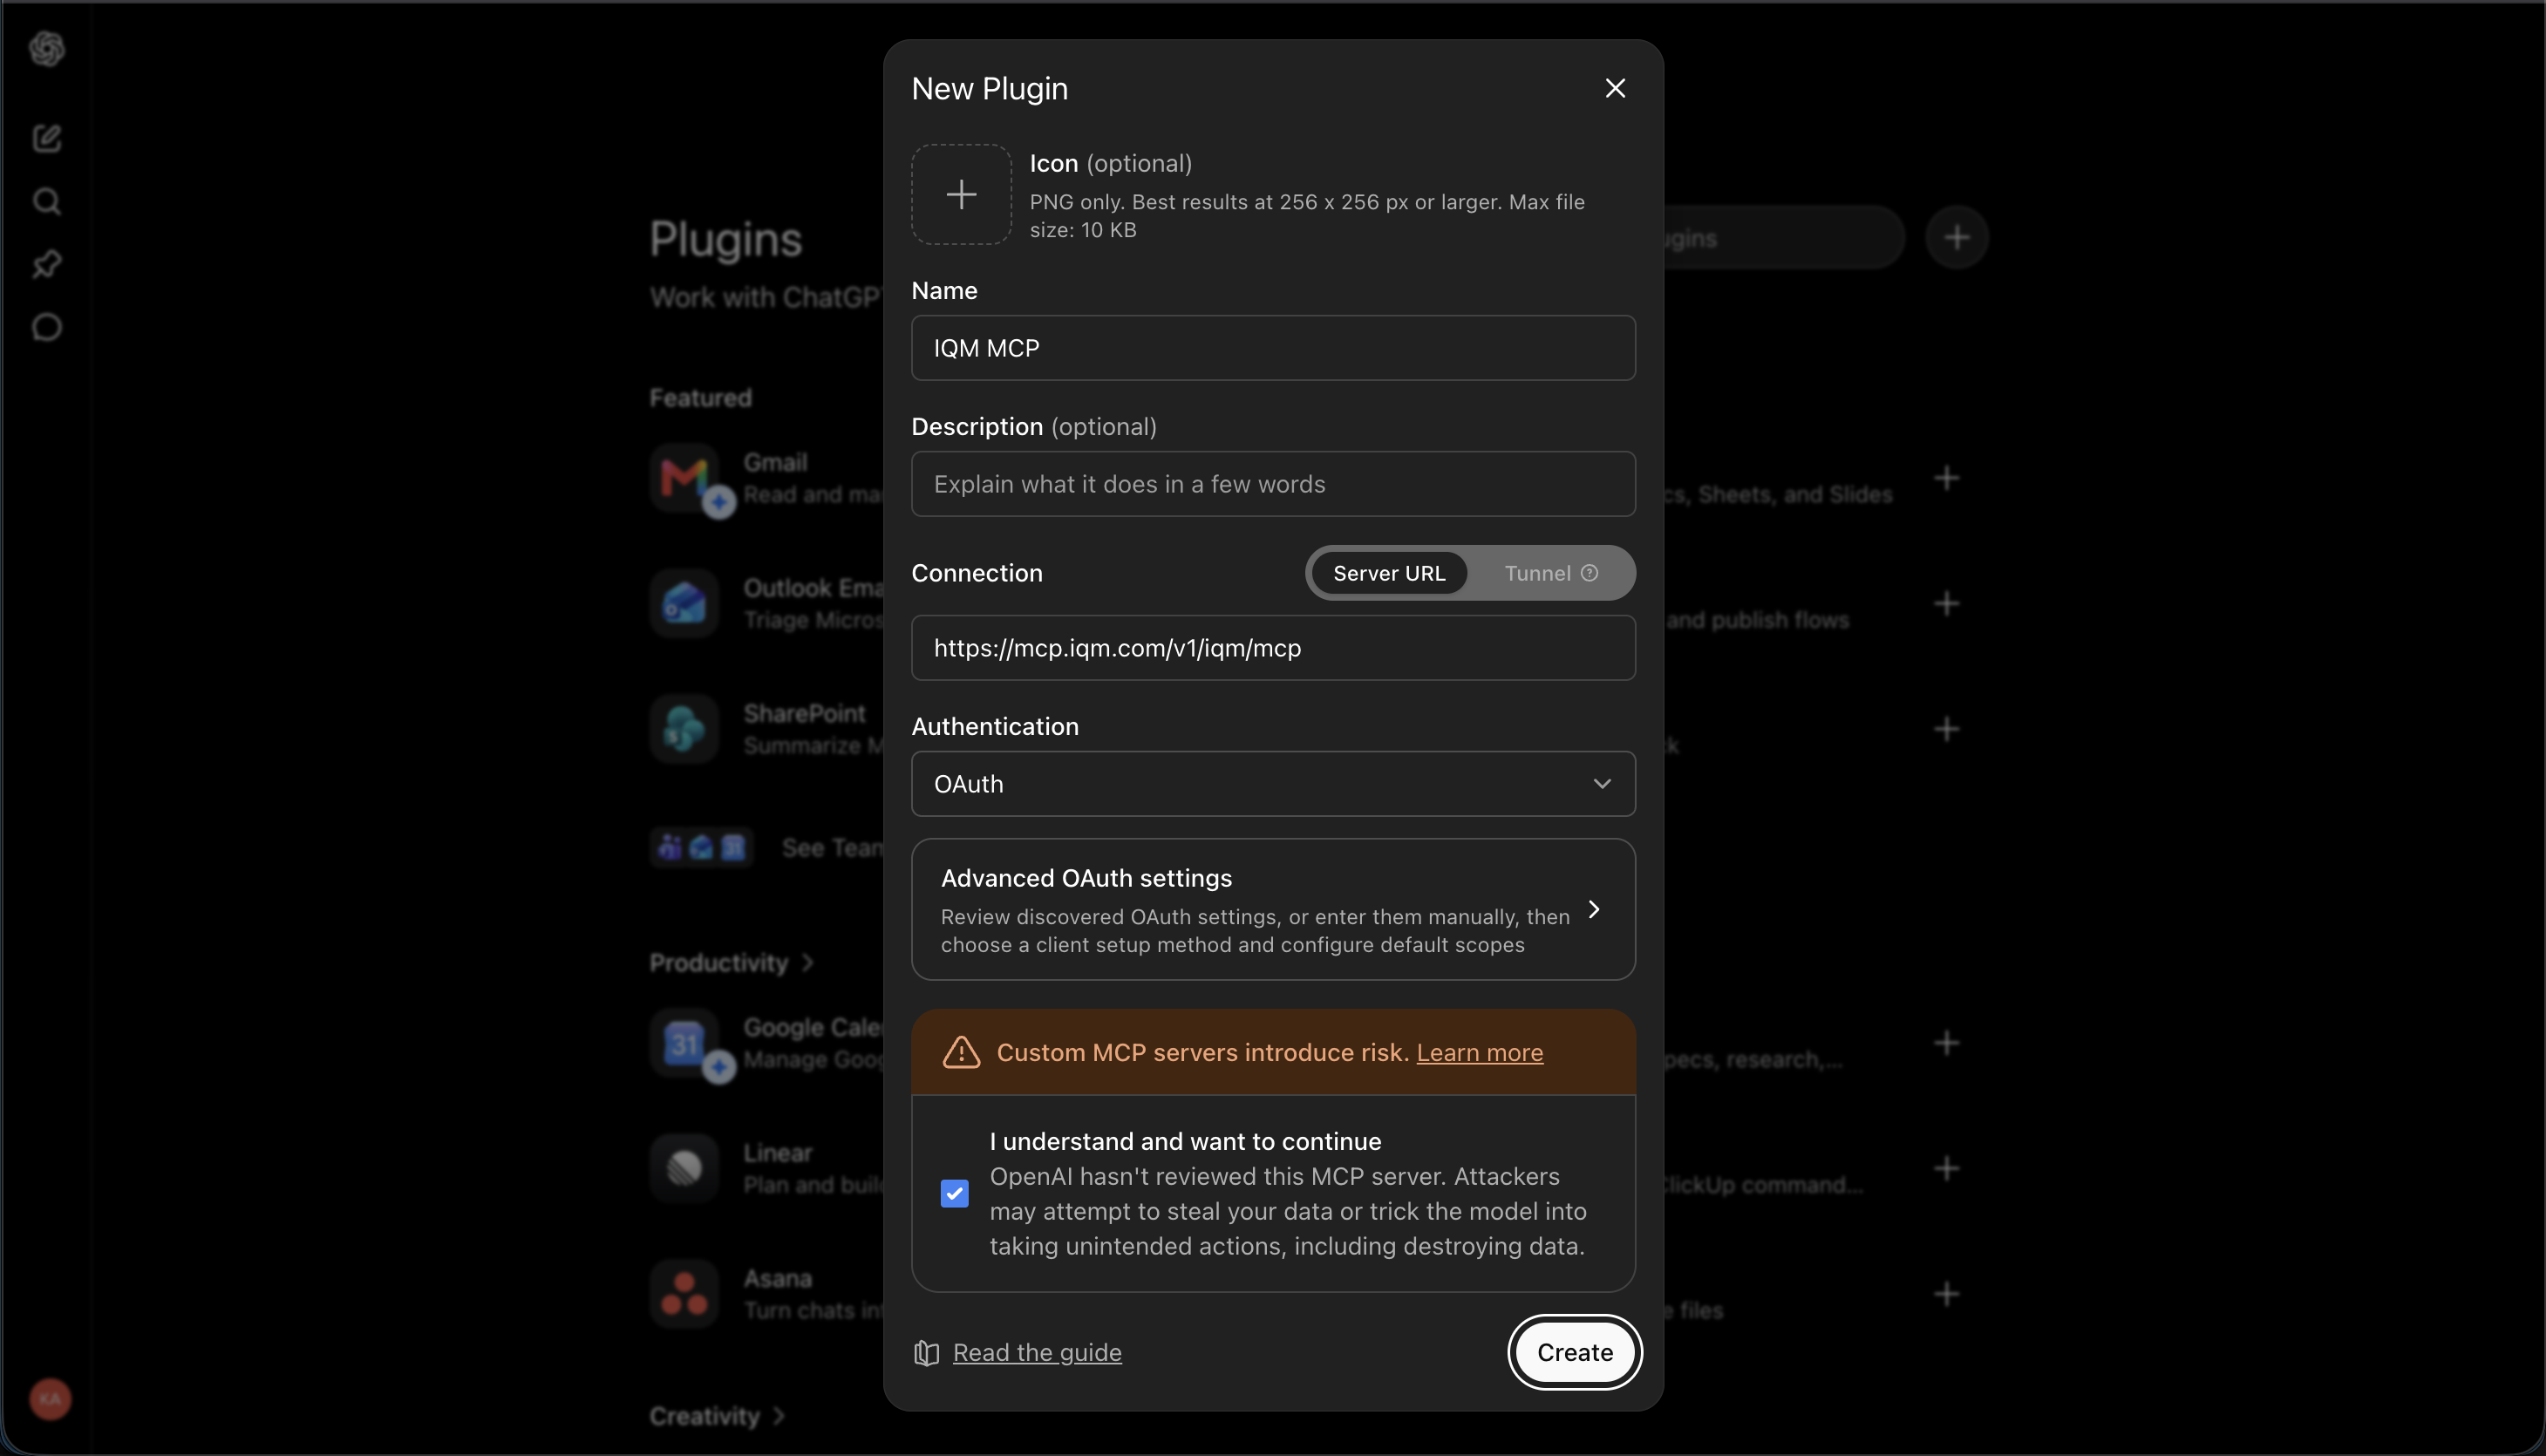
In the New Plugin window, name the connector "IQM MCP" and enter the following server URL:
https://mcp.iqm.com/v1/iqm/mcp
If you agree, check the box "I understand and want to continue" and click Create.
Step 3: Authenticate
ChatGPT redirects you to the IQM platform login page. Authenticate your IQM account and click Allow access. You're redirected back to ChatGPT, and the plugin now shows as connected.
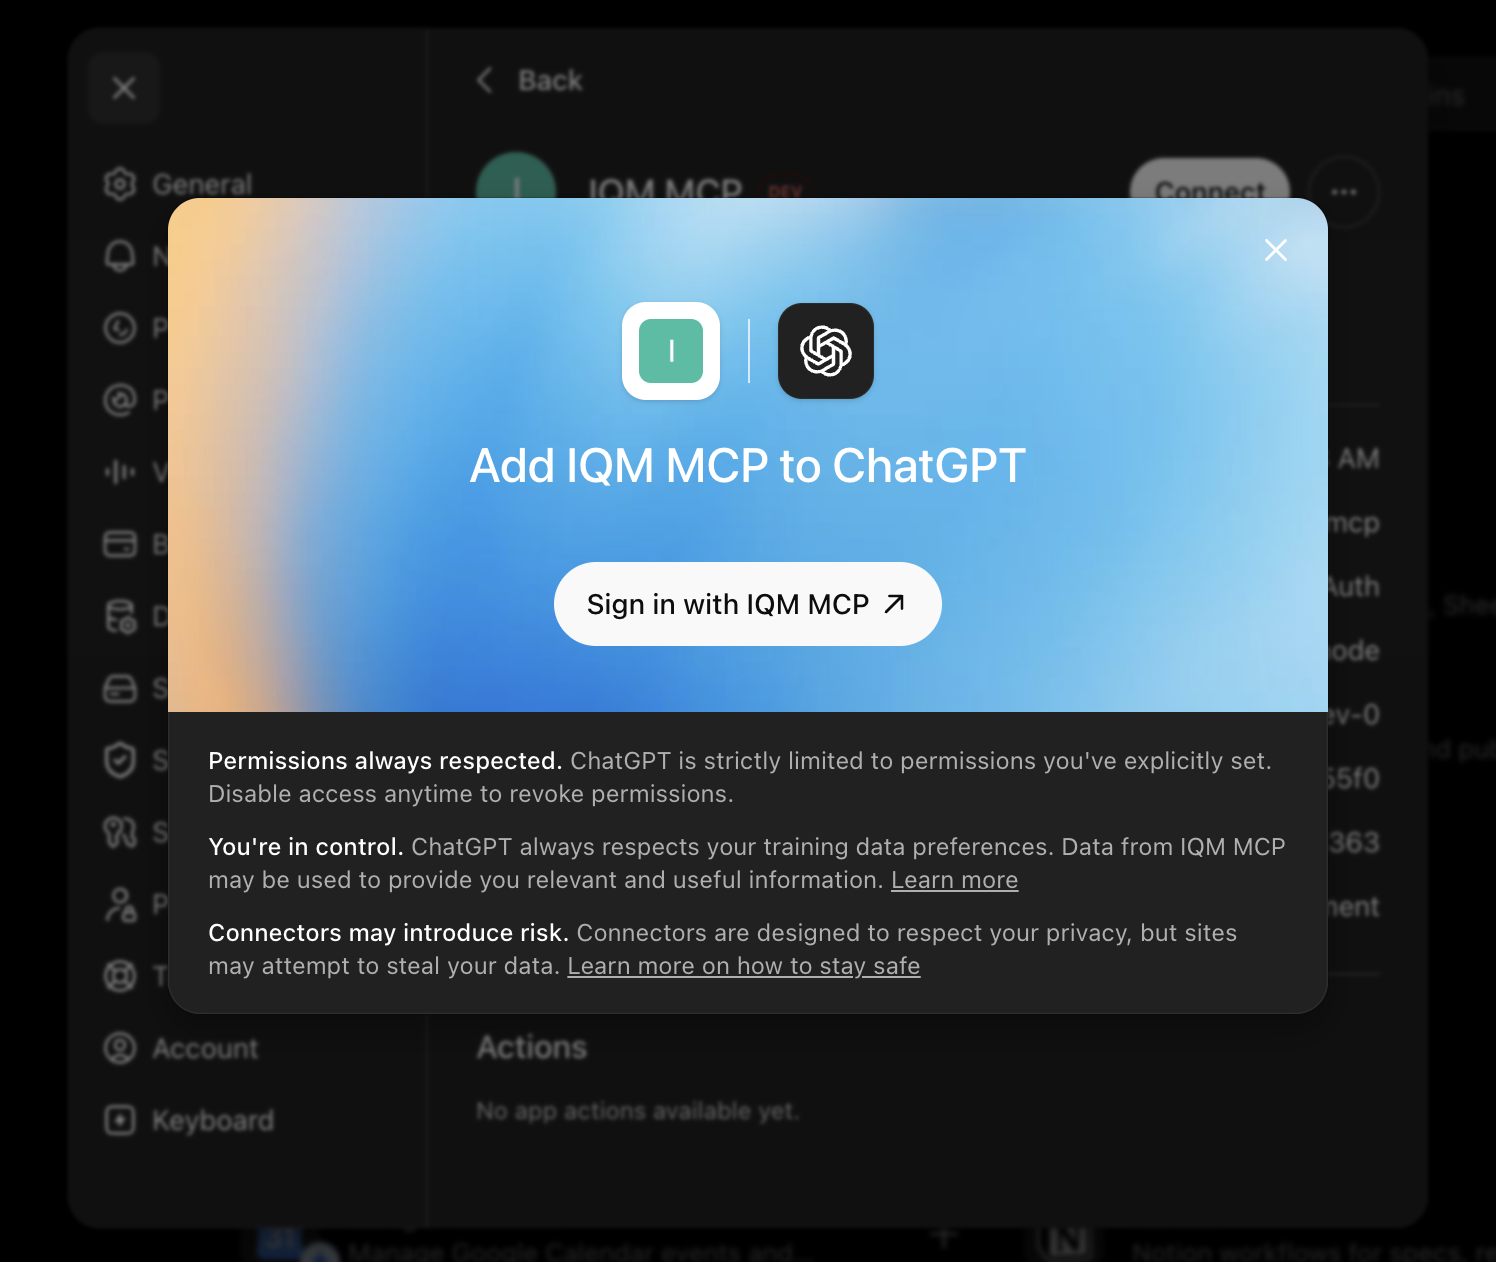
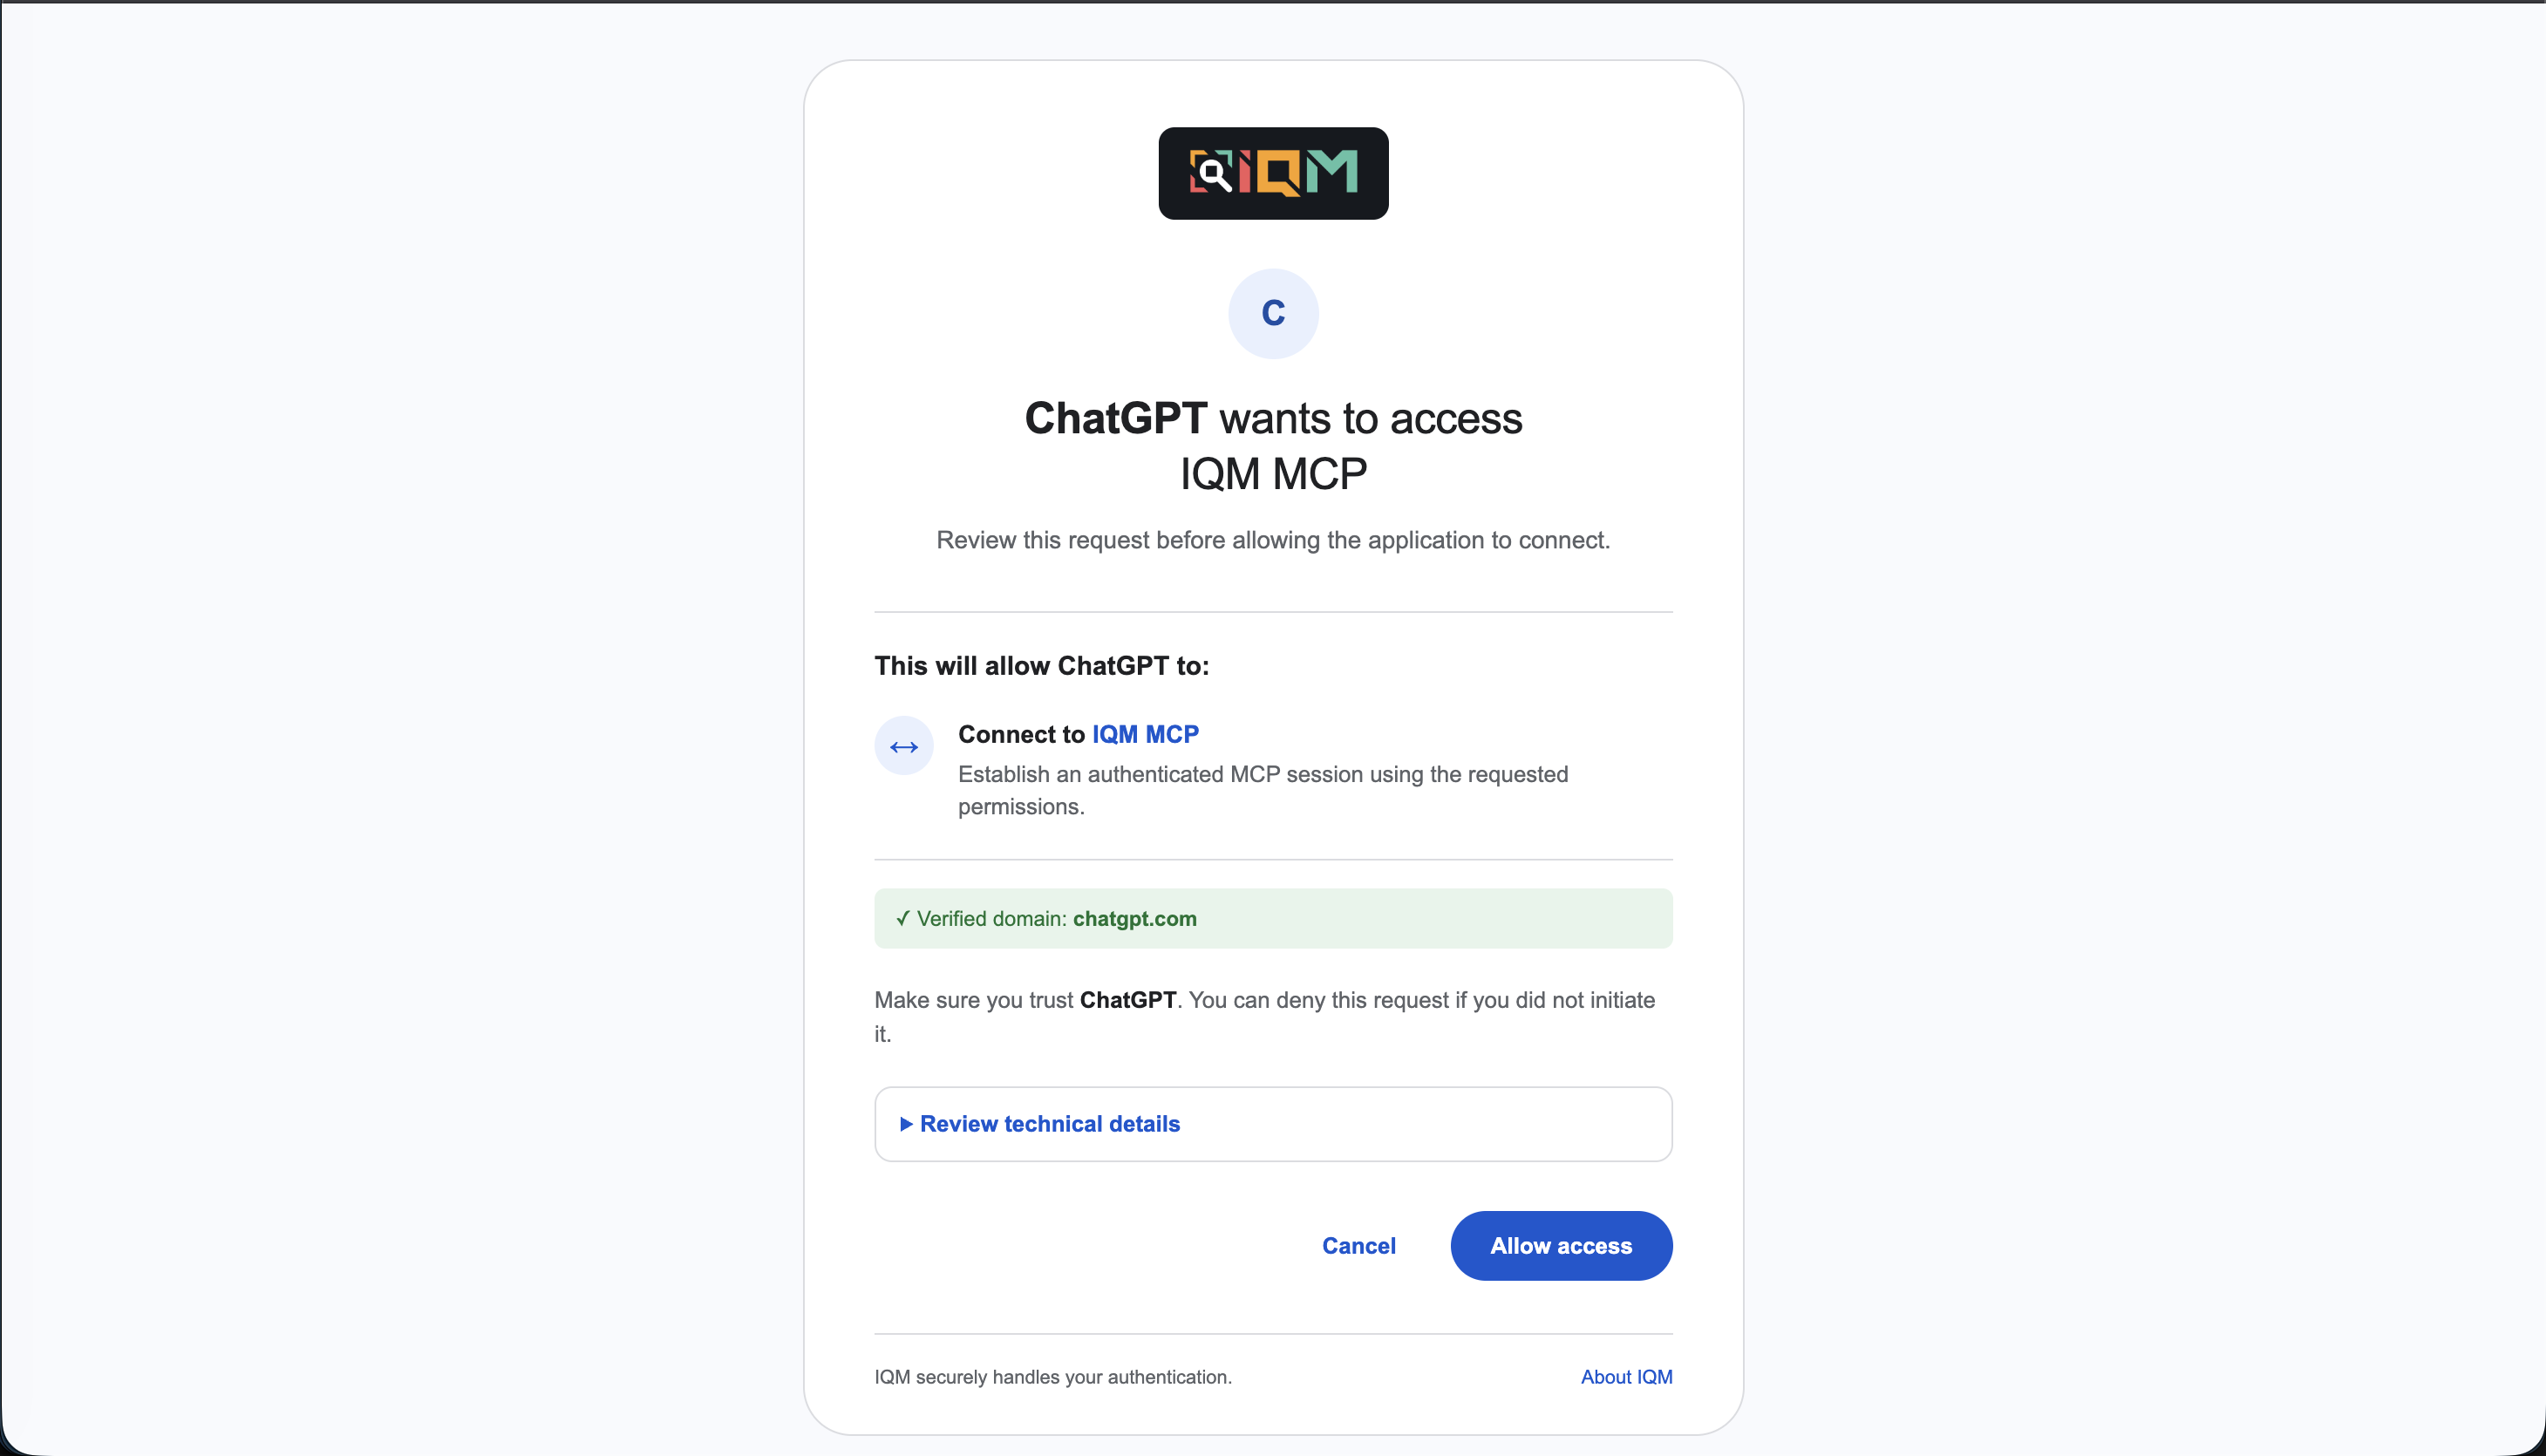
Step 4: Use IQM MCP
You can now use IQM MCP in your ChatGPT conversations. To do so, start a new conversation and either select the IQM MCP plugin from the list, or type "@iqm" to invoke the plugin. You can now ask your AI assistant to perform tasks across IQM's apps.
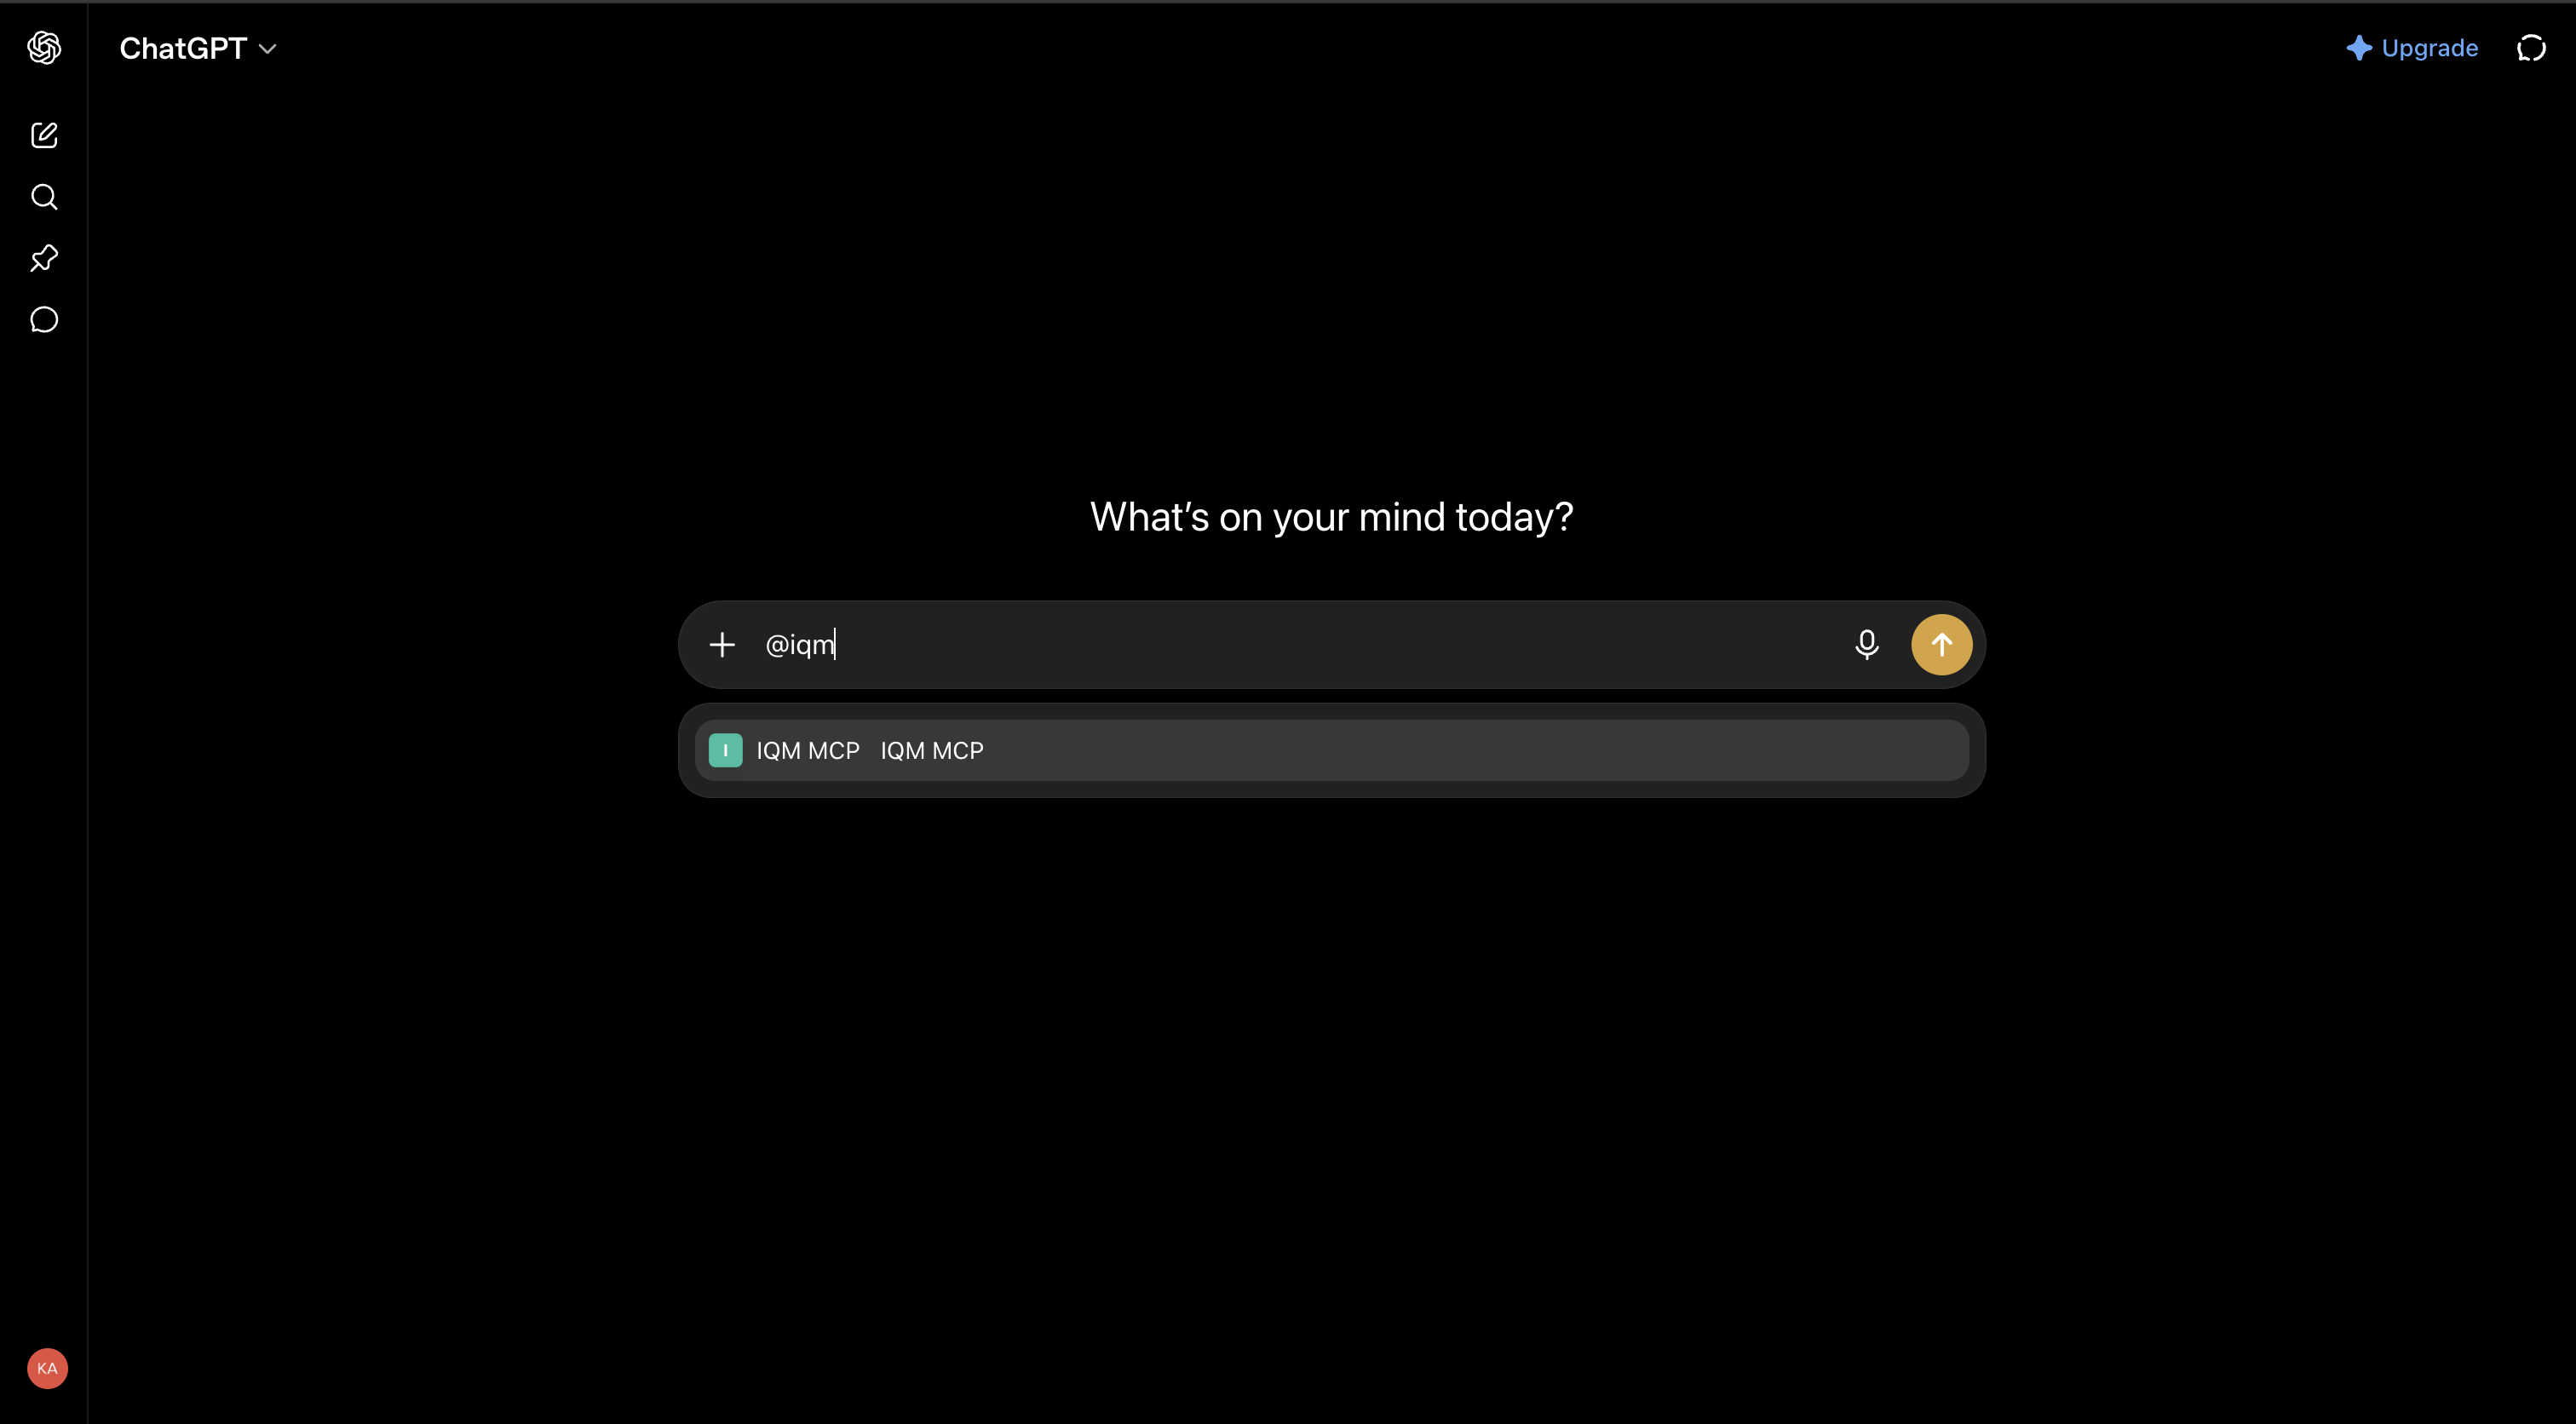
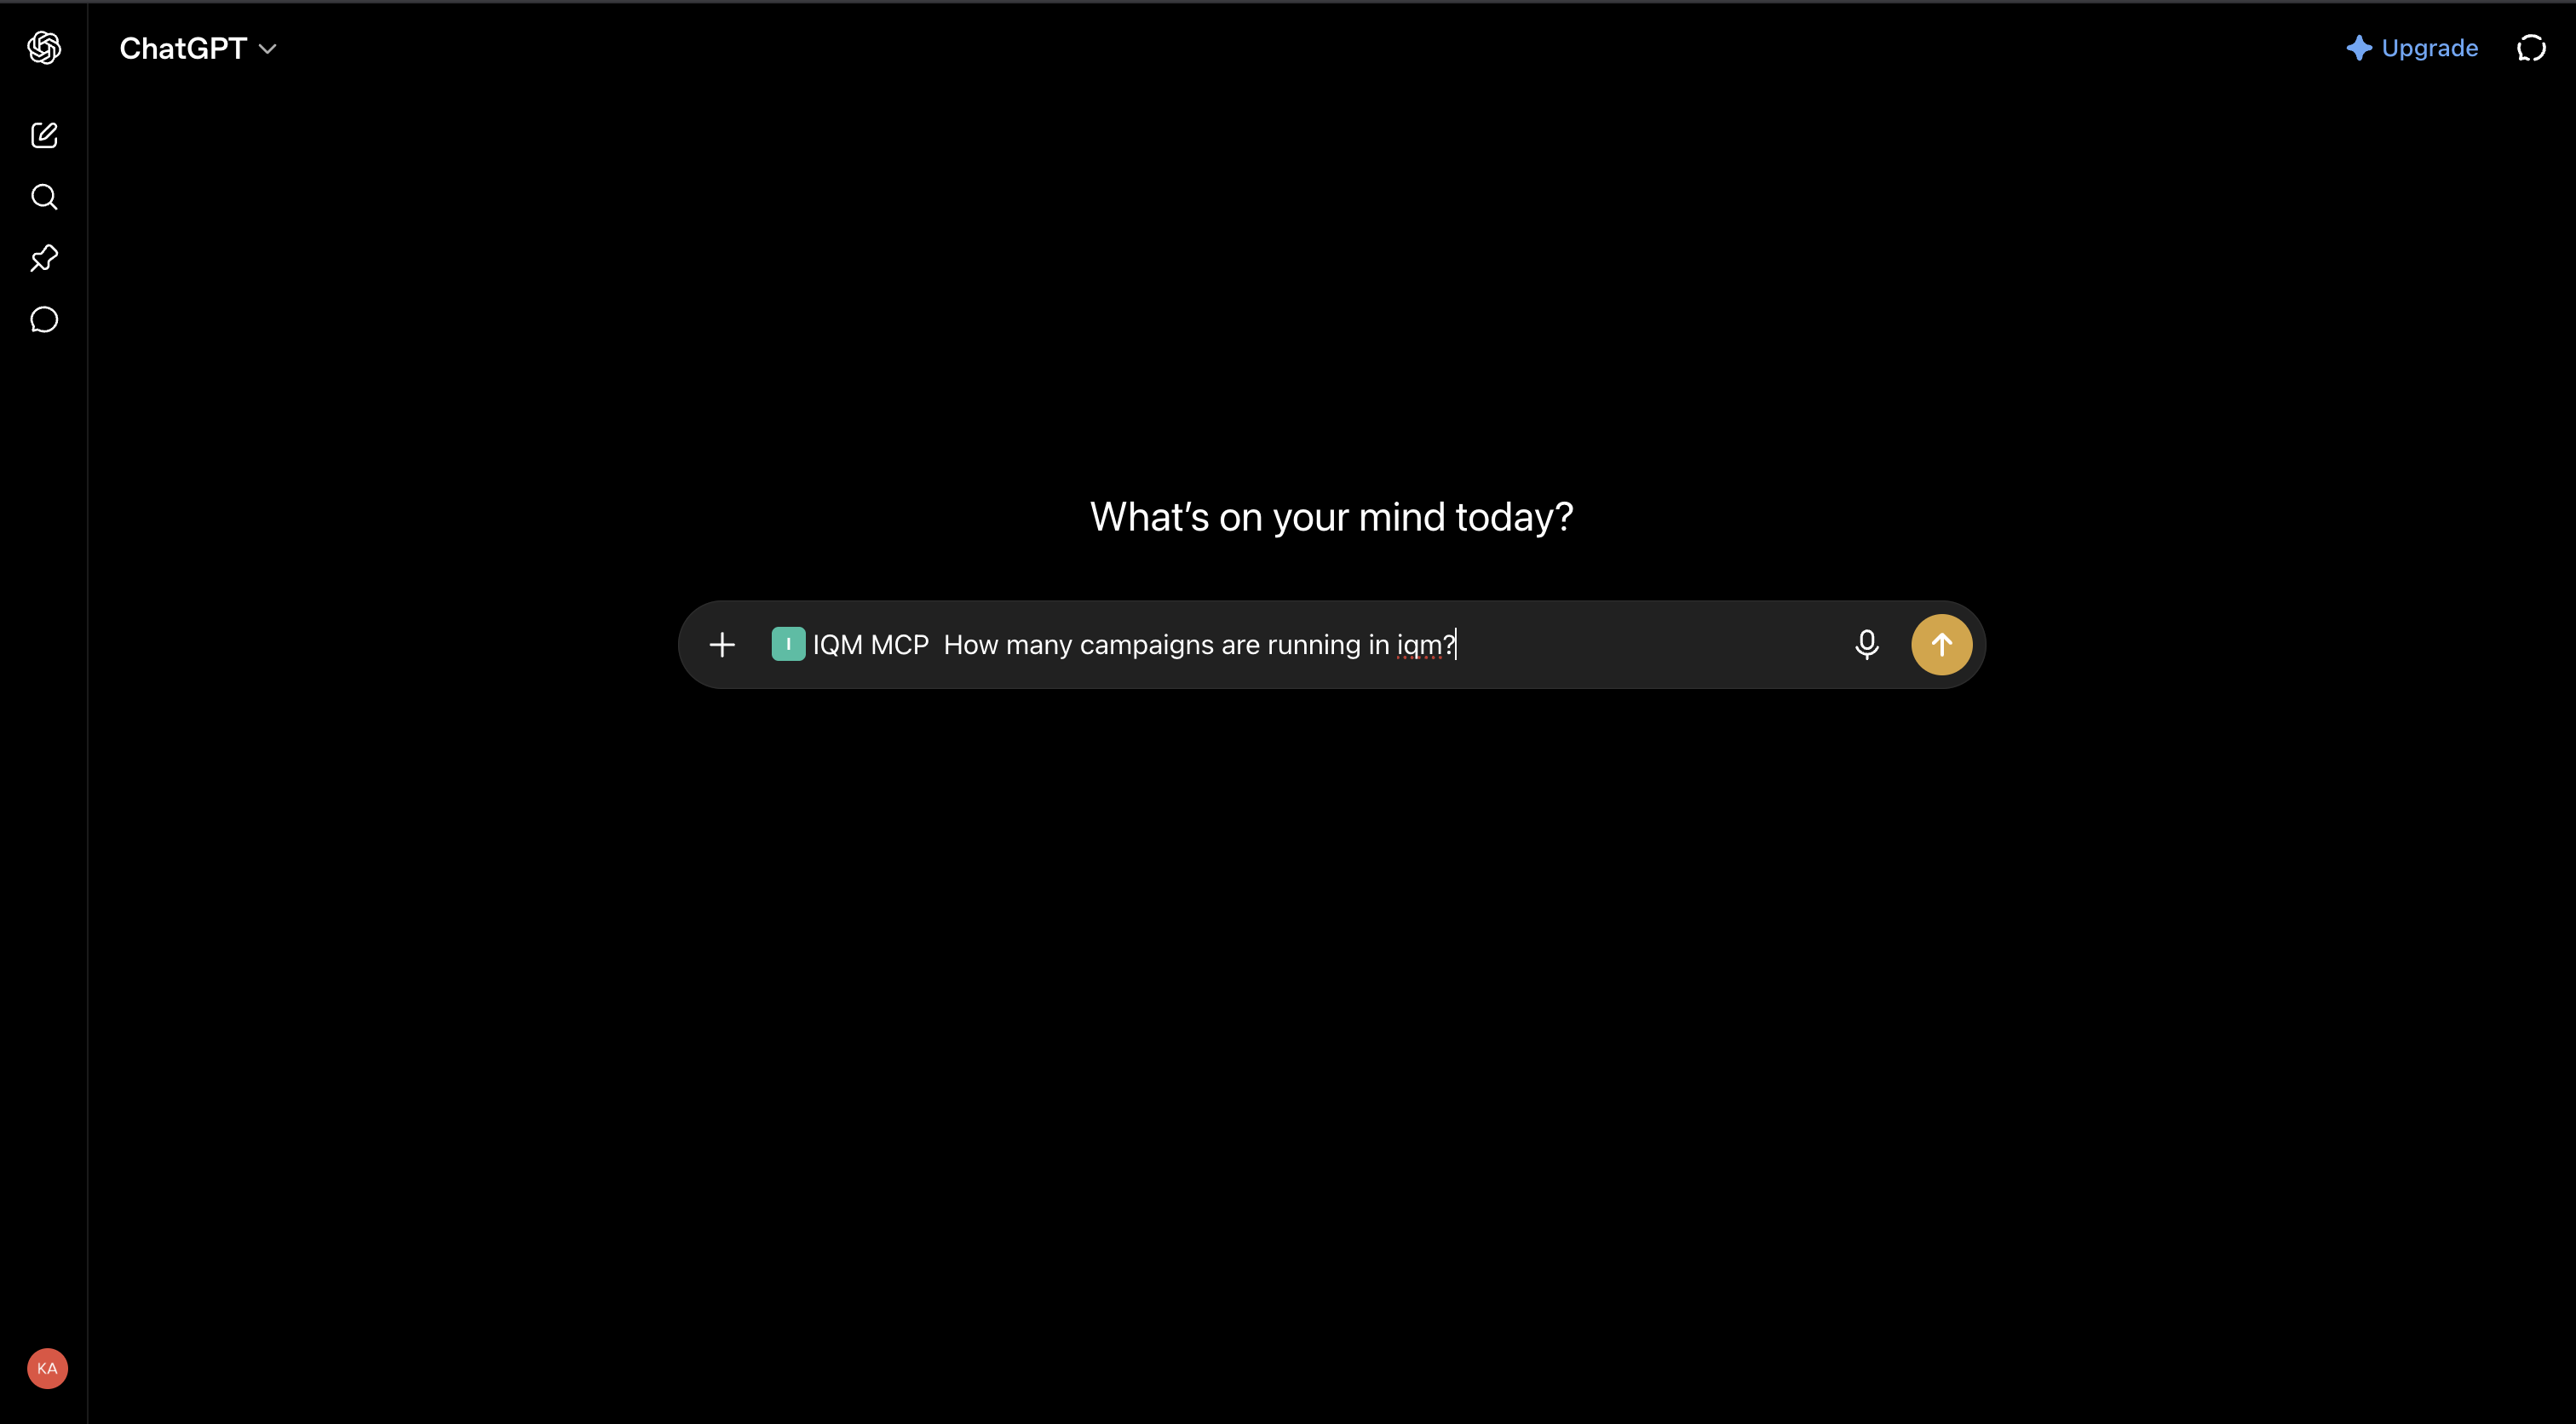
Get started with IQM MCP
You are now ready to use IQM MCP.
Next, you can check out the MCP tutorials to see more detailed guides on using each app supported by IQM MCP.