Zapier Integration
Zapier is an online tool used to connect and automate workflows between web applications. The IQM Reports app provides a convenient way to use Zapier to connect your IQM ad-serving data to other web applications via automated workflows, or Zaps.
A Zap allows you to chain web apps—such as Slack, Google Calendar, and Dropbox—together, so that when a specified event occurs in an app, Zapier performs a workflow that passes information between and executes actions in one or more other apps.
Prerequisites
Before using the IQM Reports Zapier app, you must have:
- An active IQM account
- A Zapier account
Setup
Step 1: Log In to Zapier
Go to Zapier and log in using your Zapier account.
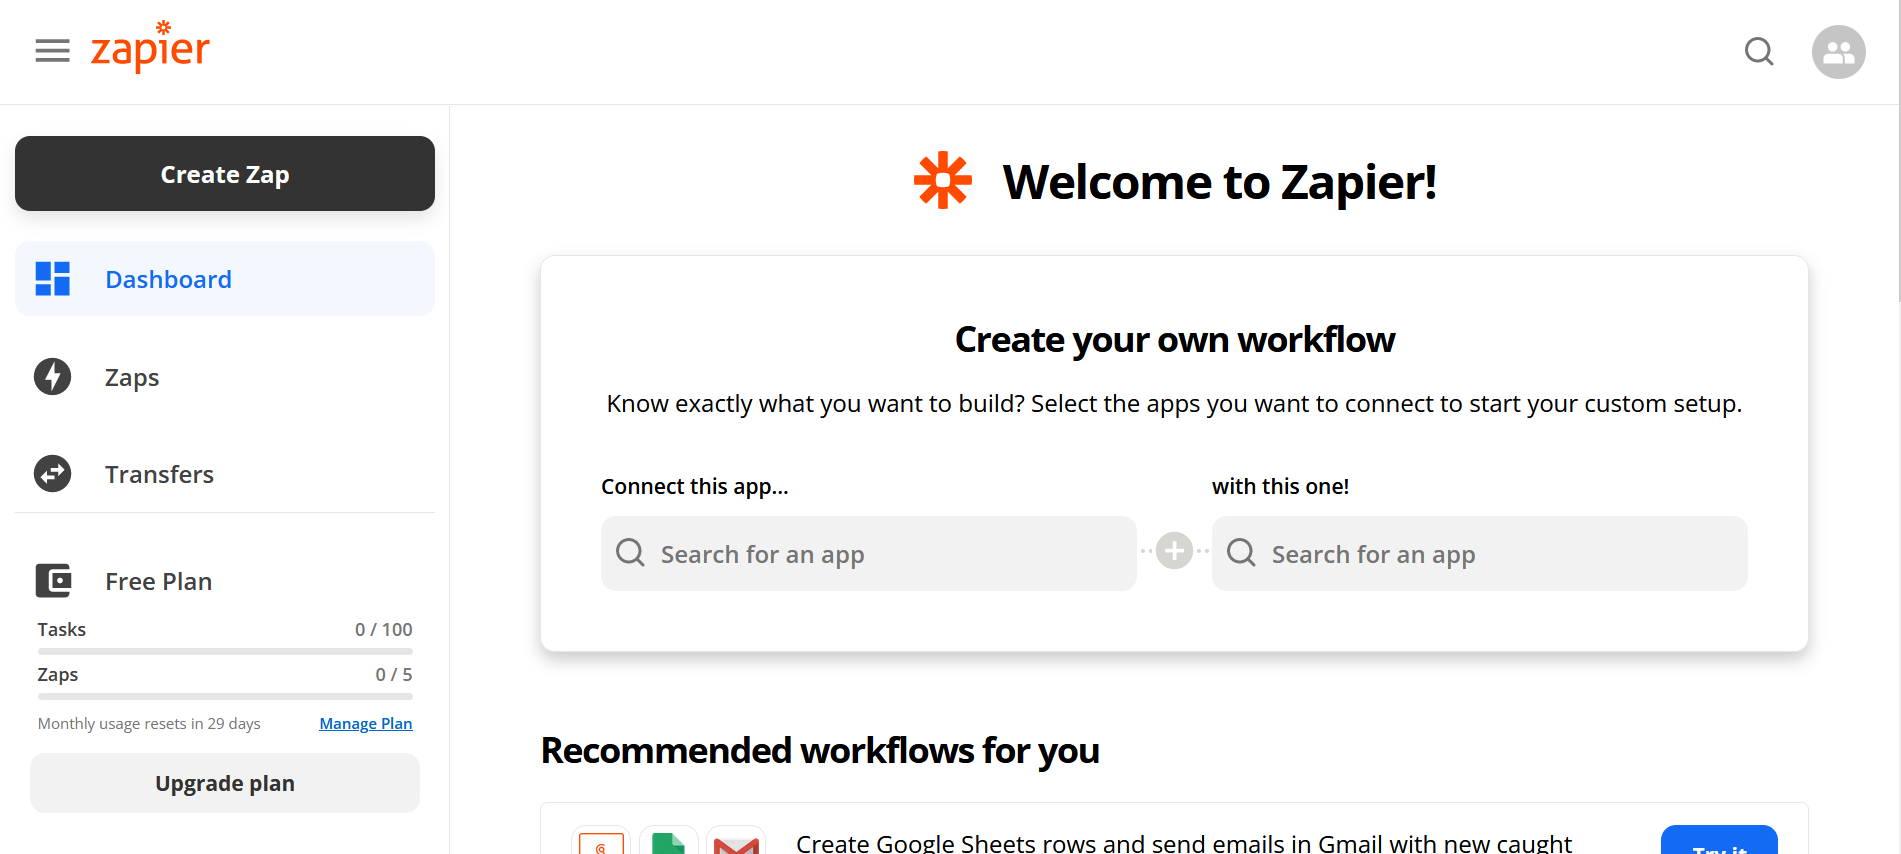
Step 2: Create a New Zap
From the Dashboard, click on Create Zap. This will open the Zap editor.
Step 3: Configure the Trigger
In the Trigger section of the Zap, select the Zap's trigger—the app and event that will cause the workflow to execute.
For example, you can use the Schedule by Zapier trigger, which causes the Zap to run at specific time intervals.
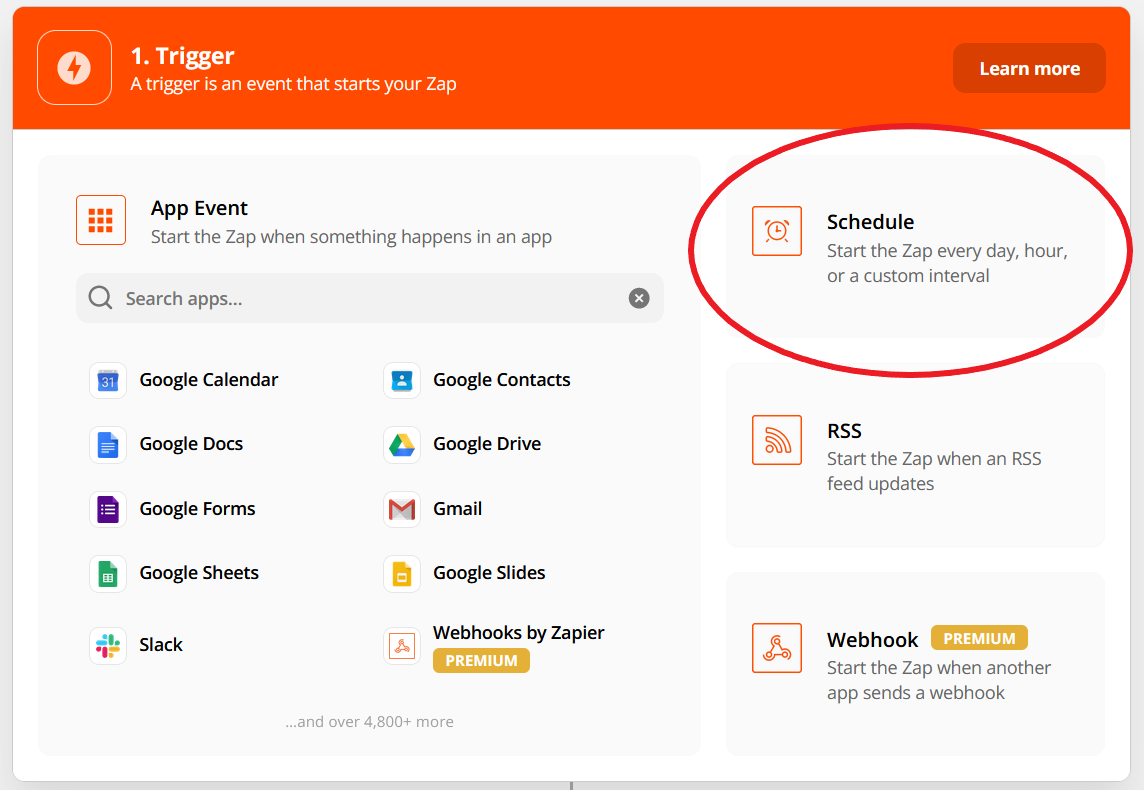
For more information about Zap triggers, see Zapier's Trigger Documentation.
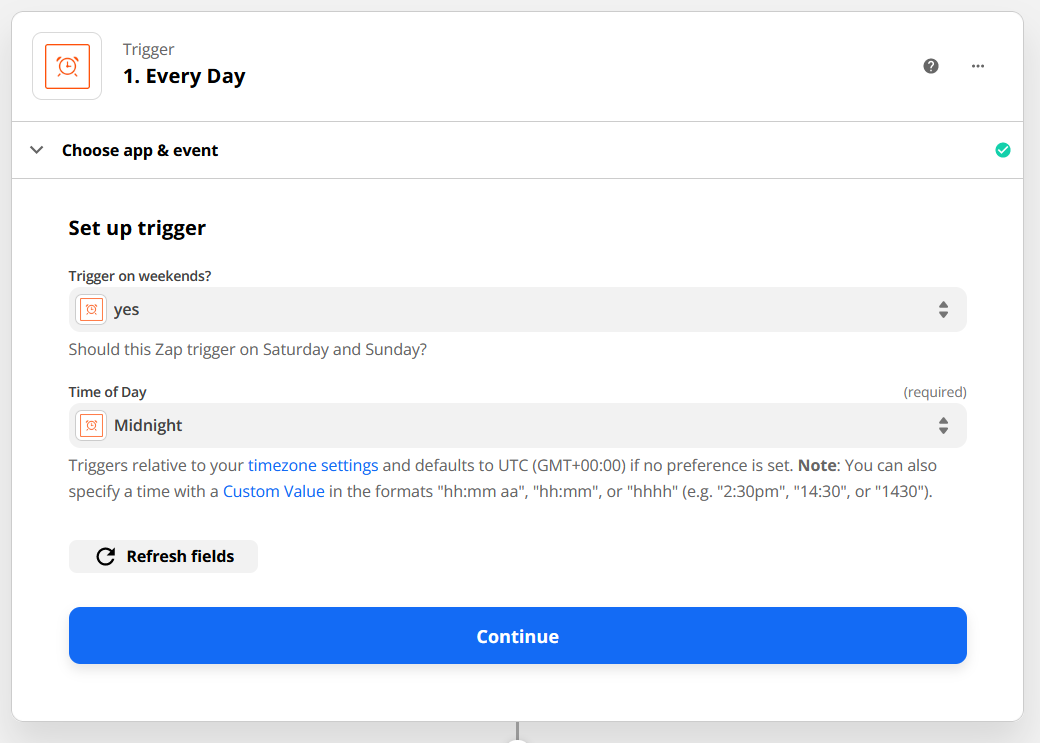
Step 4: Fill Out Trigger Settings
Fill out the Trigger section to specify trigger settings. For the Schedule by Zapier trigger, you will be asked to specify:
- The time interval in which to periodically run the Zap workflow
- The specific date or time to run the Zap
When done filling out each page of the Trigger, click Continue to move to the next section or page.
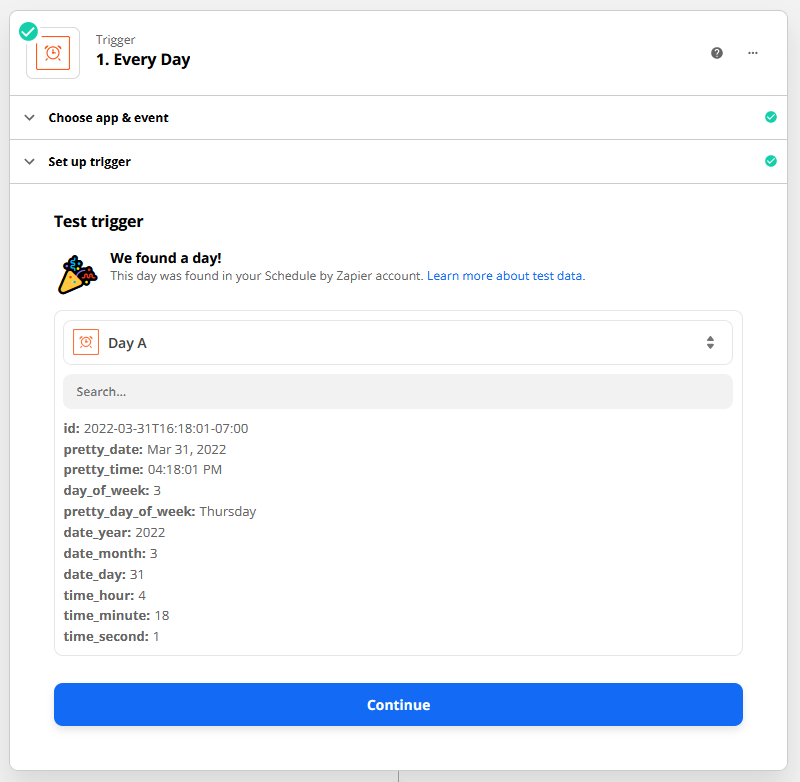
Step 5: Test the Trigger
Test the trigger by clicking the Test Trigger button. This allows Zapier to verify that the trigger is working correctly.
When you test the trigger, the output fields of the trigger are shown (e.g., id, pretty_date, pretty_time). The output fields of the trigger step can be mapped into the input fields of any subsequent action in the Zap.
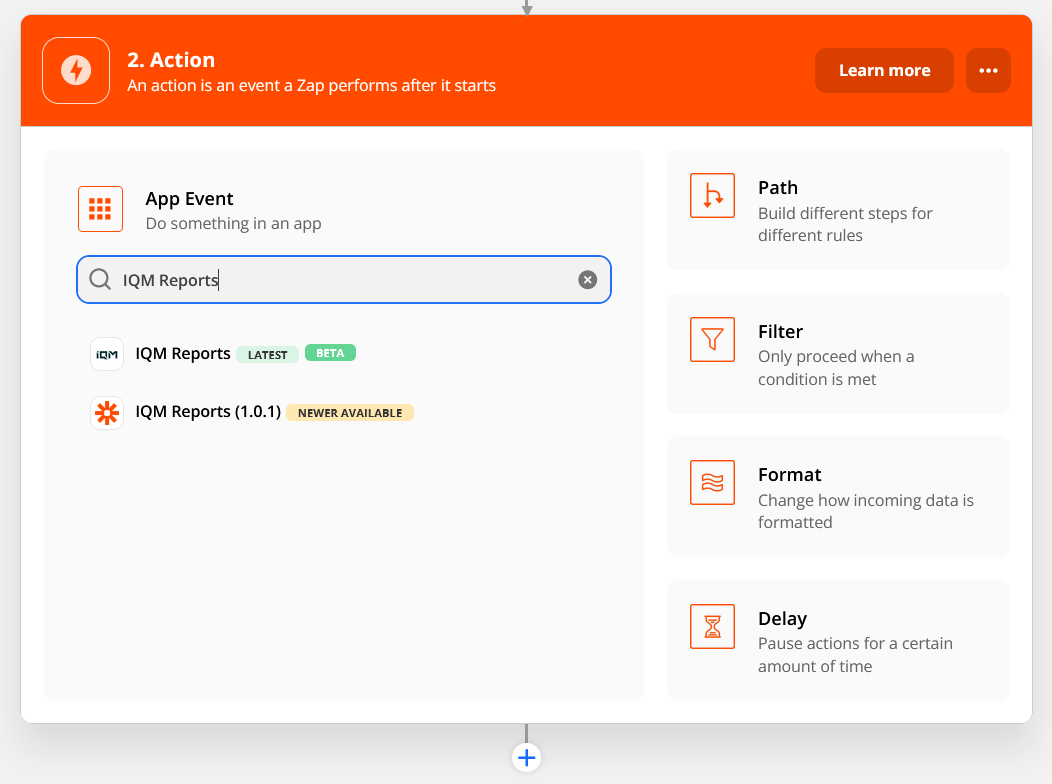
Step 6: Add the IQM Reports Action
Choose and configure the Action that the Zap performs each time it is triggered:
- Search for "IQM Reports" in the search bar
- Select the IQM Reports option with the green "Latest" icon next to it
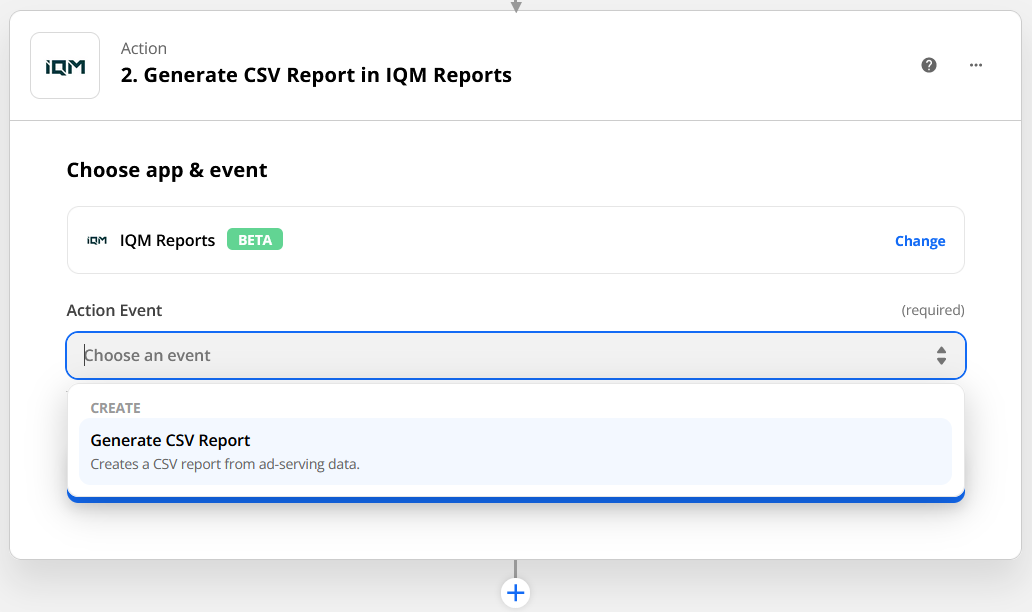
Step 7: Select the Action Event
From the Action Event dropdown, select Generate CSV Report. This action generates a CSV report containing the aggregated ad-serving data of your running Campaigns generated over a specified date range.
Click Continue.
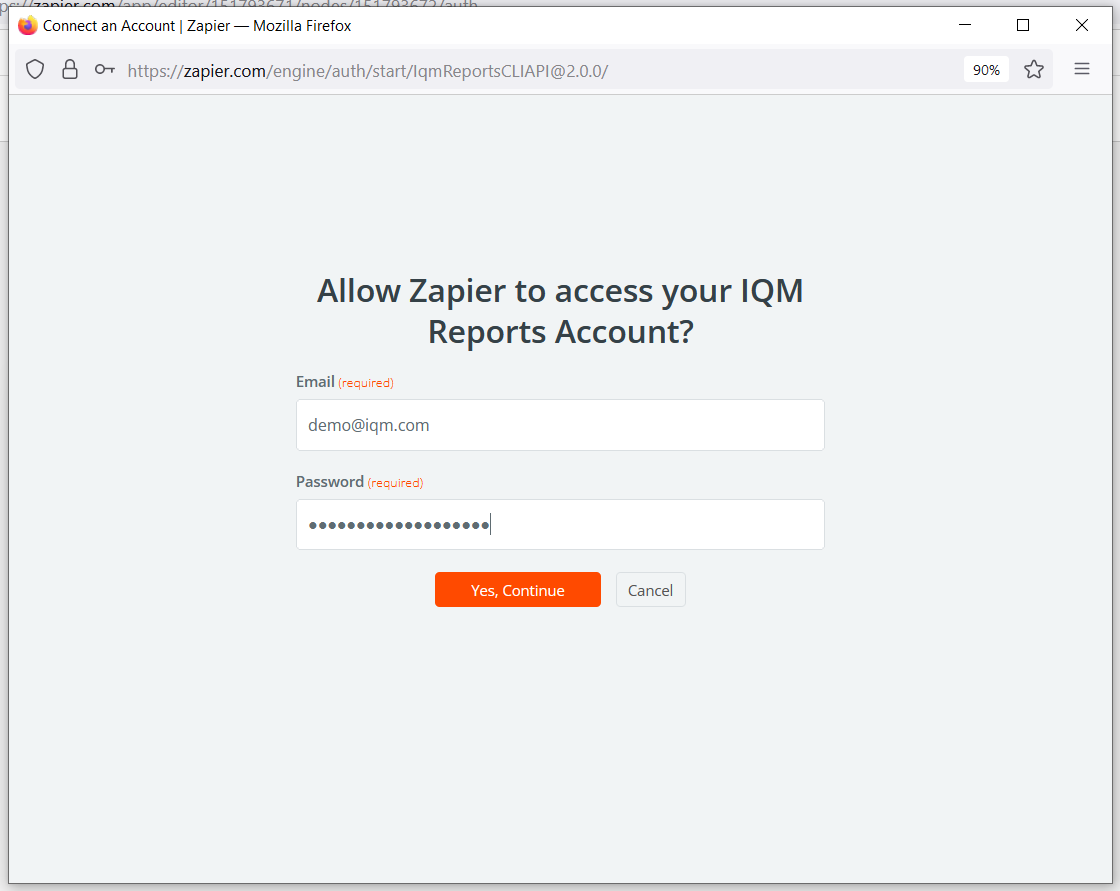
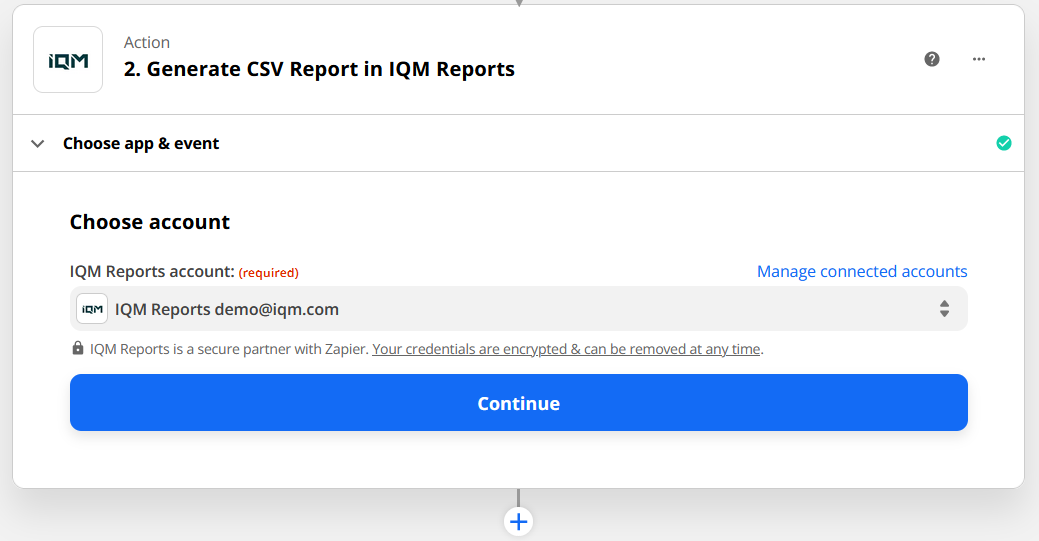
Step 8: Sign In to IQM
Click the Sign in to IQM Reports button. In the popup:
- Fill in your IQM email address and password
- Click Yes, Continue
- Click Continue to set up the action

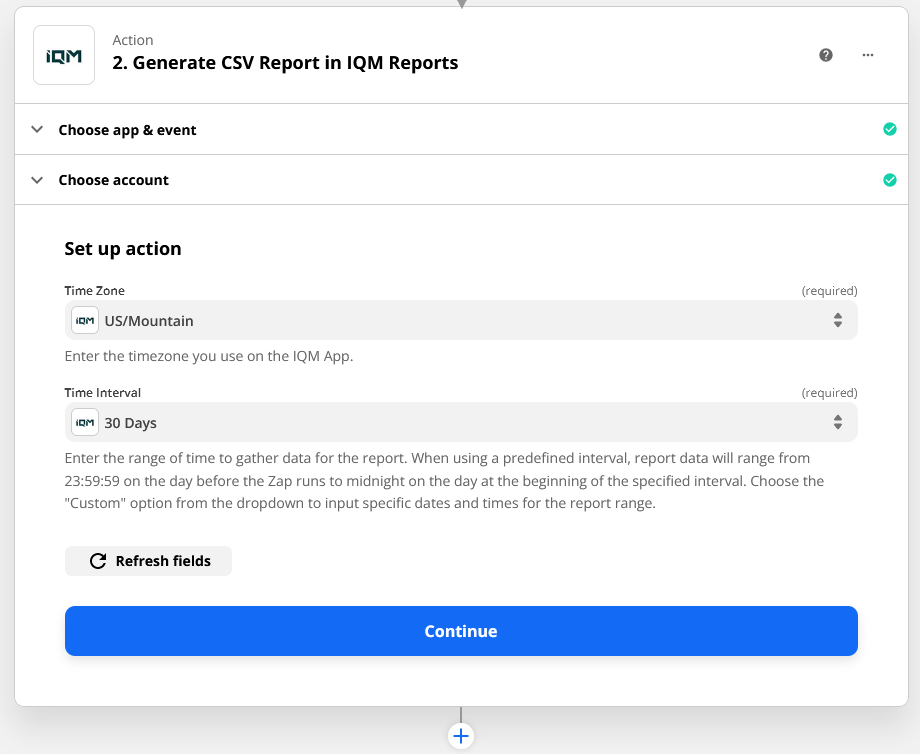
Step 9: Configure Report Settings
Set up the action by choosing:
| Parameter | Description |
|---|---|
| Time Zone | The timezone for the report date range |
| Time Interval | Predefined intervals (start at midnight on the first day and end at 11:59 PM on the last day) |
Custom Time Interval
The Custom Time Interval option allows for finer control over the report's date range:
- Input specific dates and times
- Map datetime values from the trigger into the start and end dates
- Use Zapier's built-in datetime modifiers
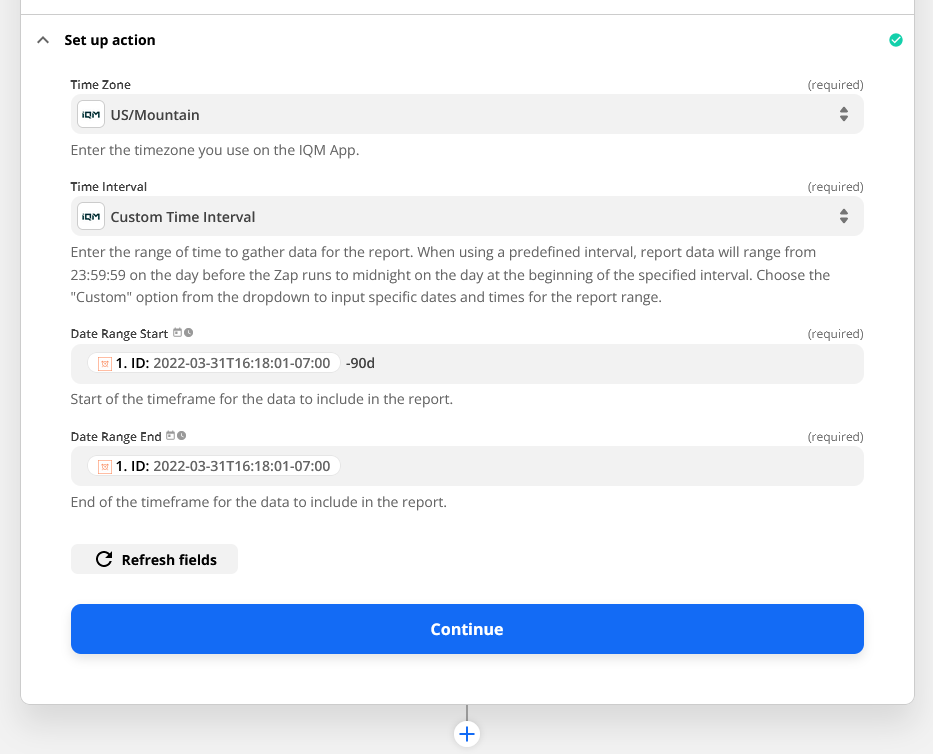
Any timezone offsets entered in custom datetime fields are ignored by the IQM Reports app. The time zone selected in the dropdown is used to calculate the report date range.
For information on datetime modifiers, see Zapier's Datetime Documentation.
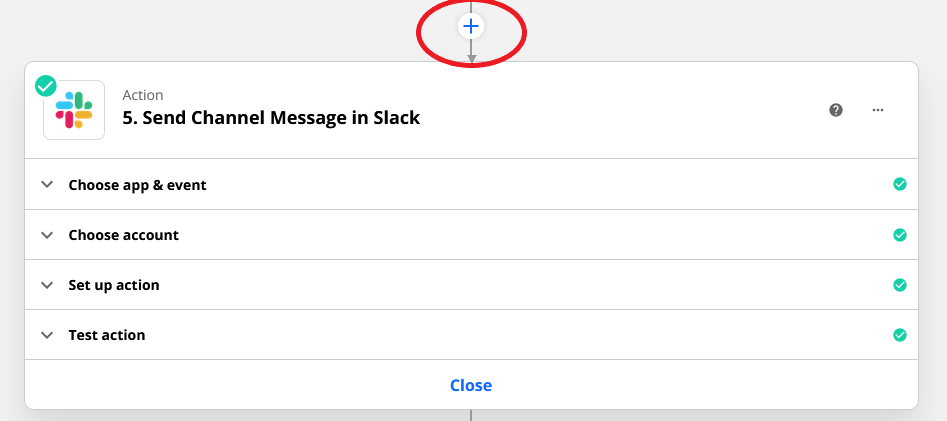
Step 10: Add Additional Actions
After setting up IQM Reports, you can add further actions by clicking the + symbols. This allows you to make use of the CSV ad-serving report file generated by IQM Reports by mapping it into other apps, such as Dropbox or Slack.

Example: Posting Reports to Slack
Add Slack Action
- Select Slack as the next action following IQM Reports
- Choose the Send Channel Message action event
- Sign into your Slack account when prompted
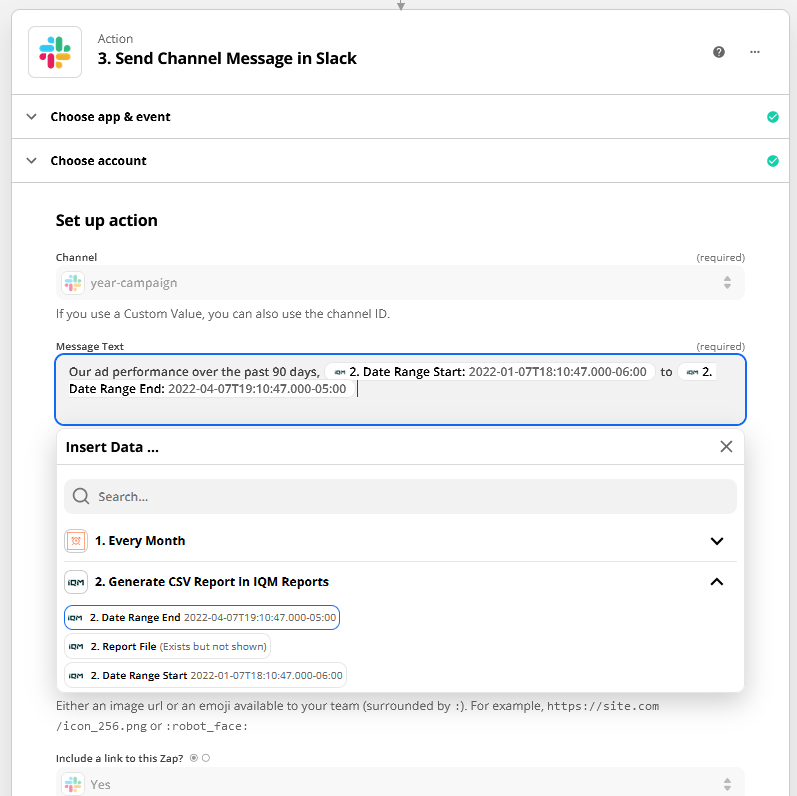
Configure Slack Message
Fill out the required fields:
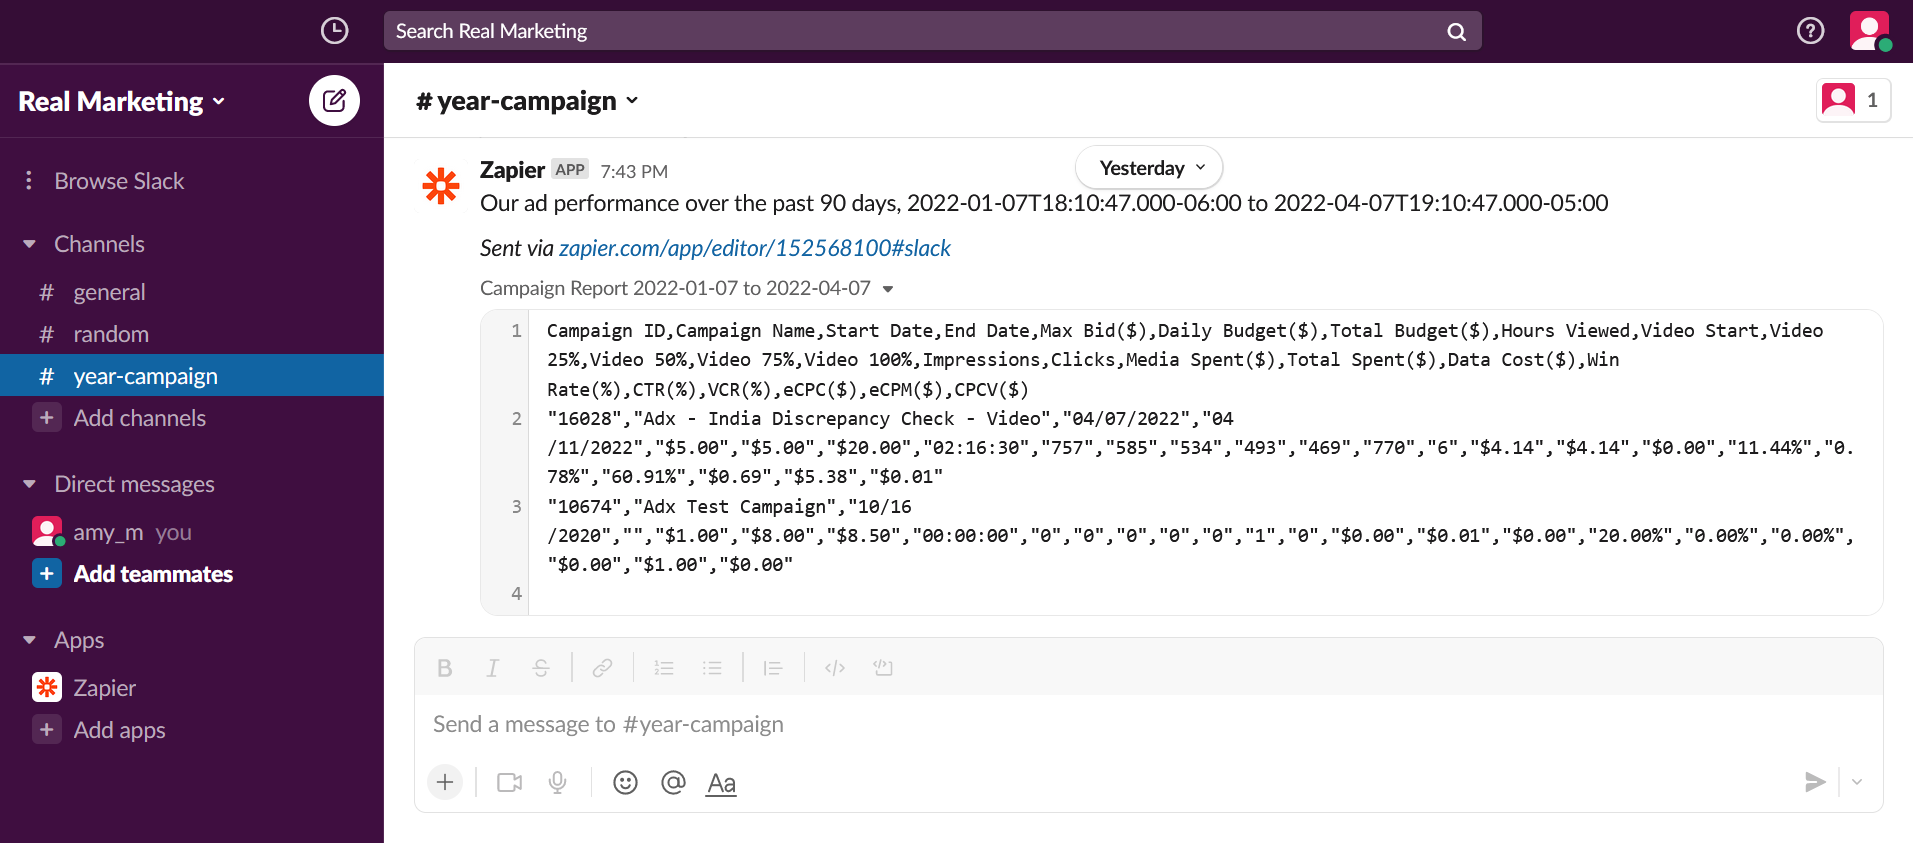
- Channel: Choose the Slack channel to post the message to
- Message Text: Fill in the message text (you can map output fields from IQM Reports, such as Date Range Start and Date Range End)
- File: Map the Report File from IQM Reports to attach the CSV report to the Slack message

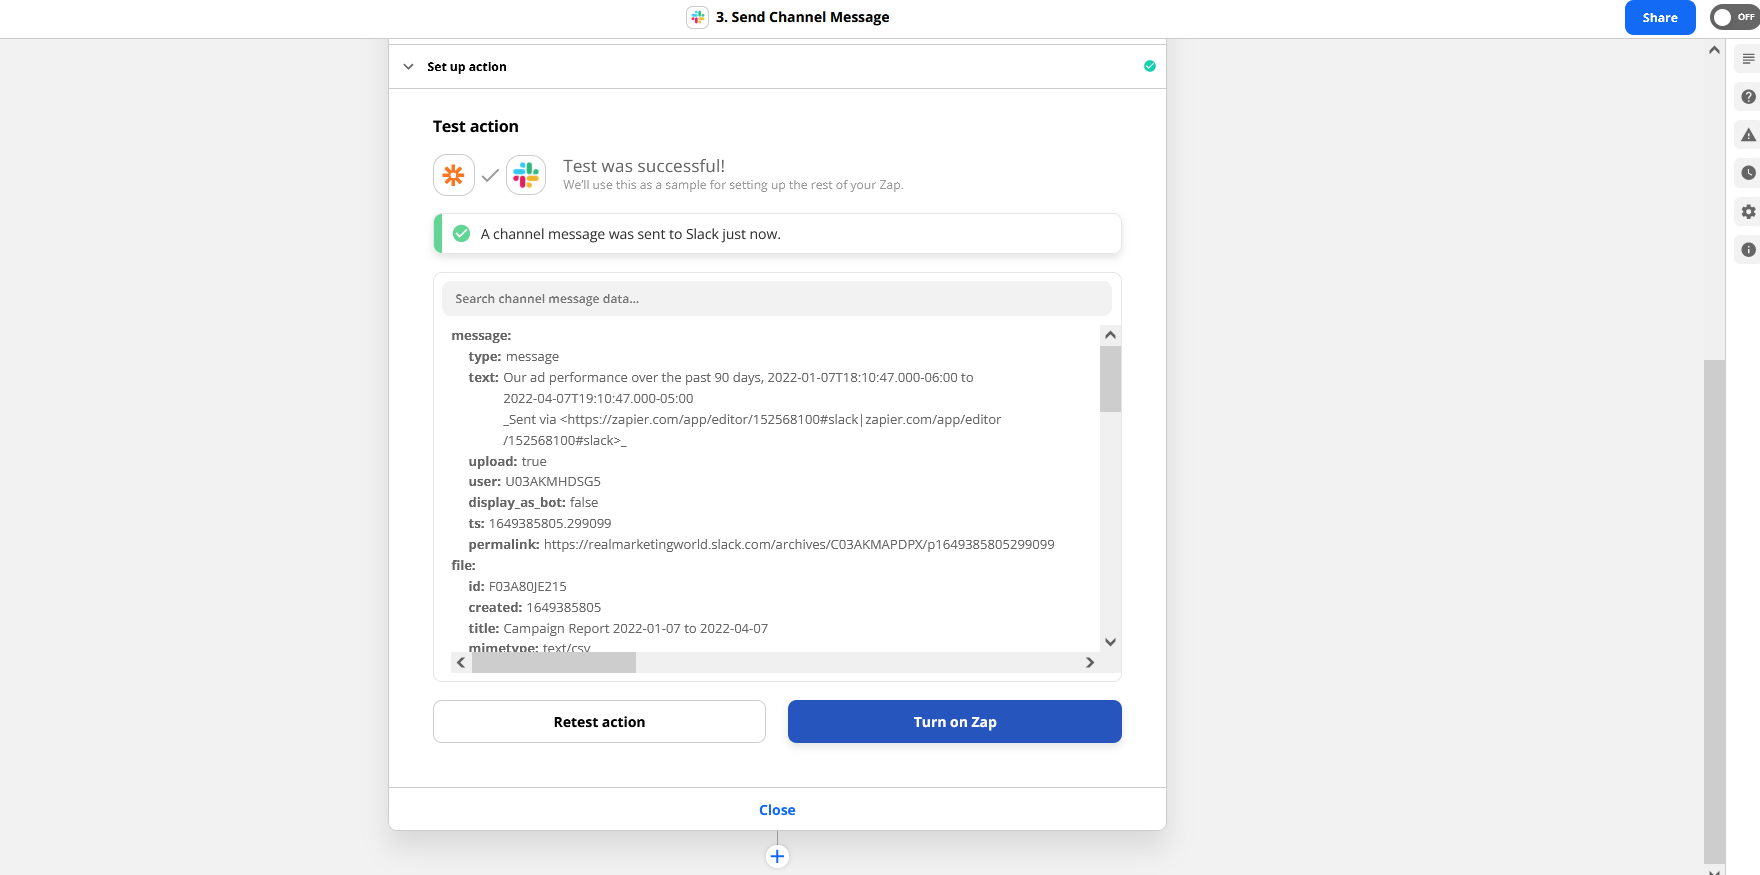
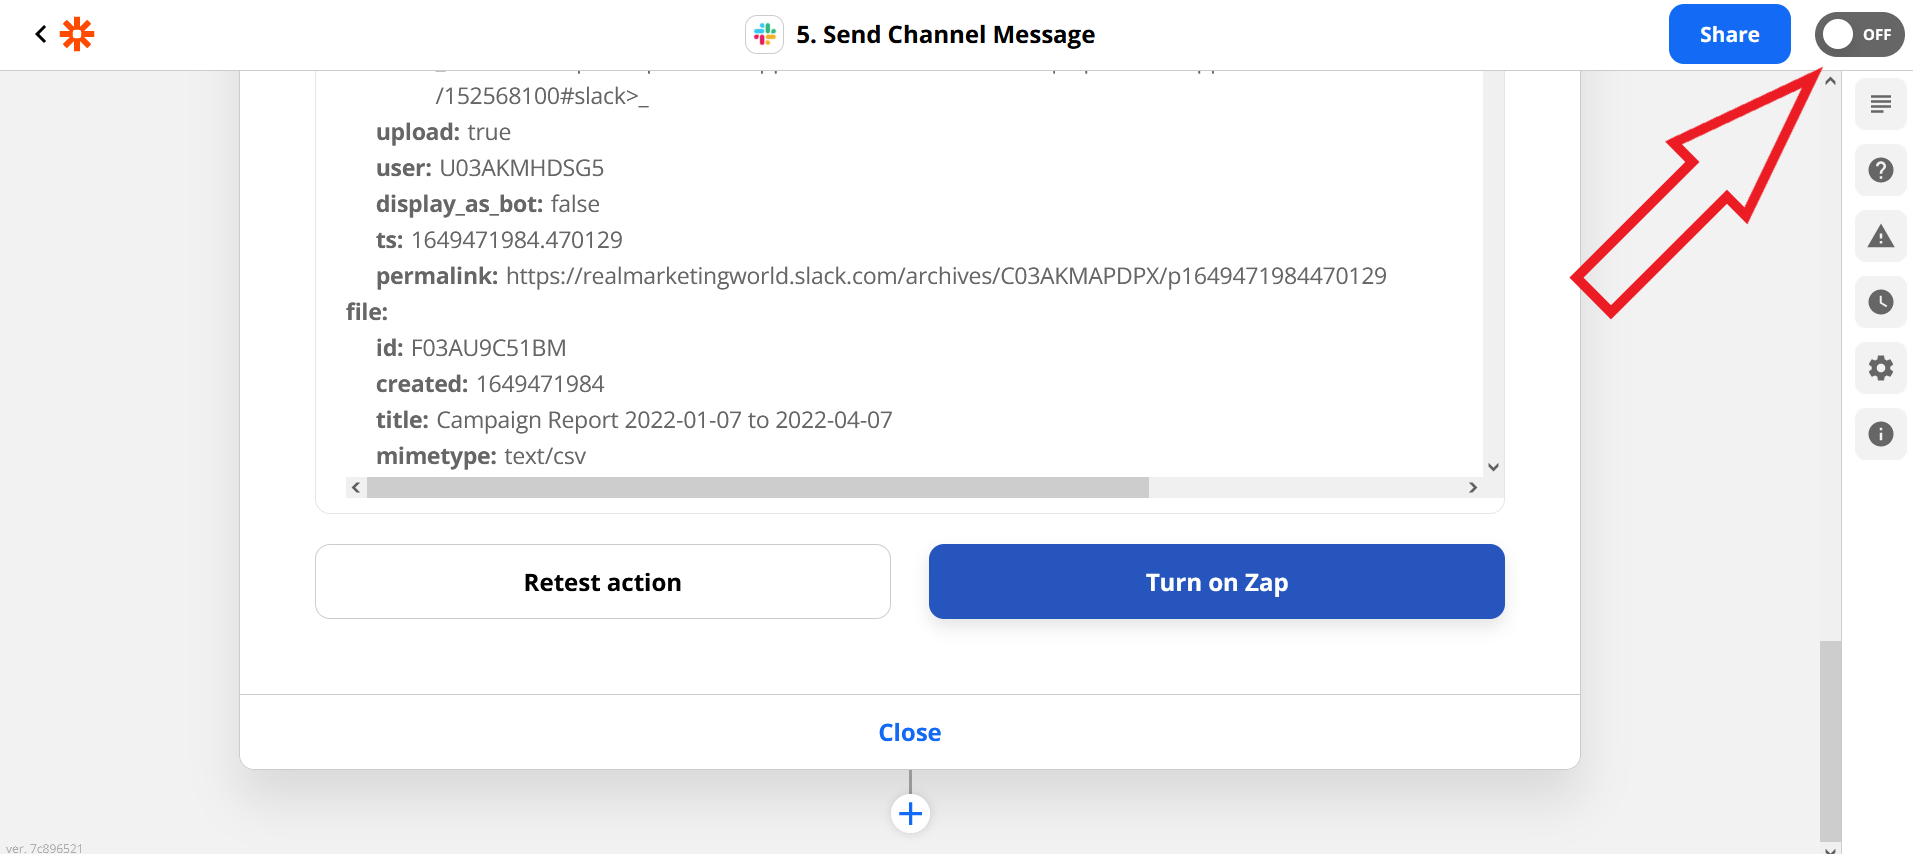
Click Continue, then test the action. You should see a message appear in the selected Slack channel with the CSV report attached.
Turn On the Zap
Click the Turn on Zap button to activate your automation.
Formatting Date Outputs
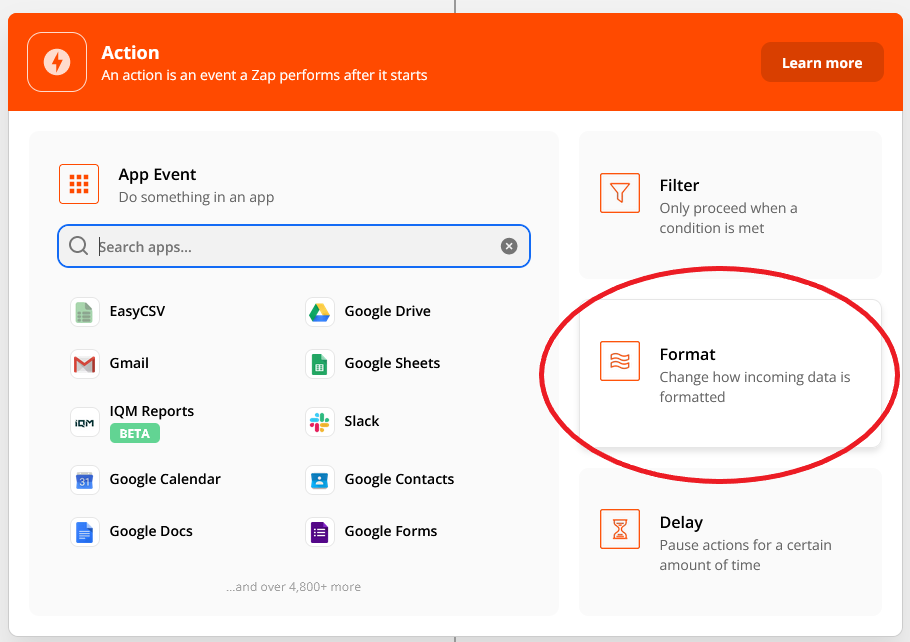
The Date Range Start and Date Range End output fields are presented in the ISO-8601 datetime format. This format is useful for computers, but not very user-friendly for a Slack message. To display these dates in a more readable format, use the Formatter by Zapier action to convert the dates. Formatter actions provide a number of useful utilities for transforming data.
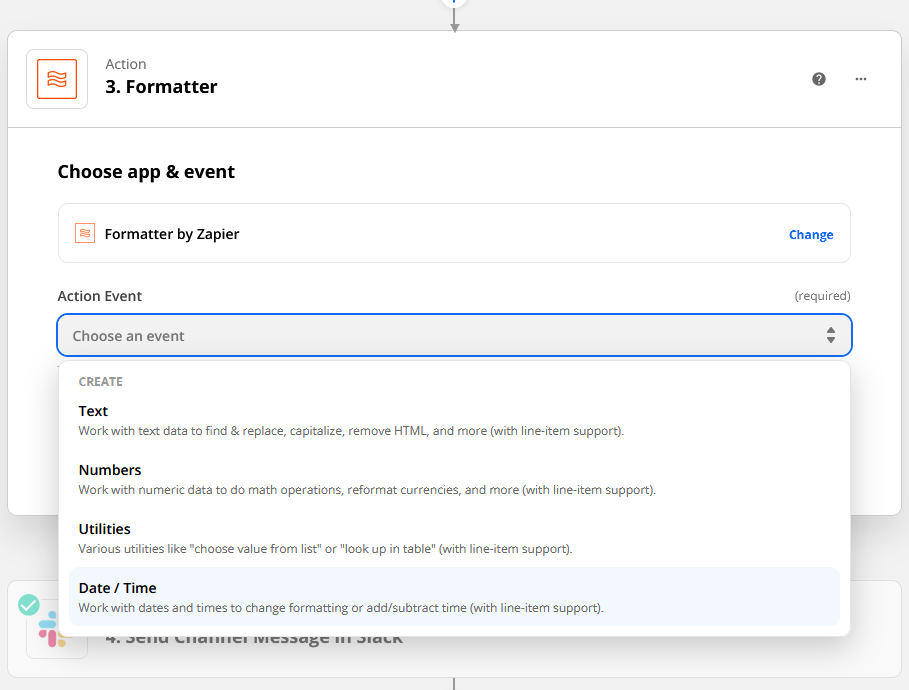
Add the Formatter Action
- Click the + button above the Slack action
- Select Format for the action
- Under Choose app & event, select Date / Time in the Action Event dropdown and Format in the Transform dropdown
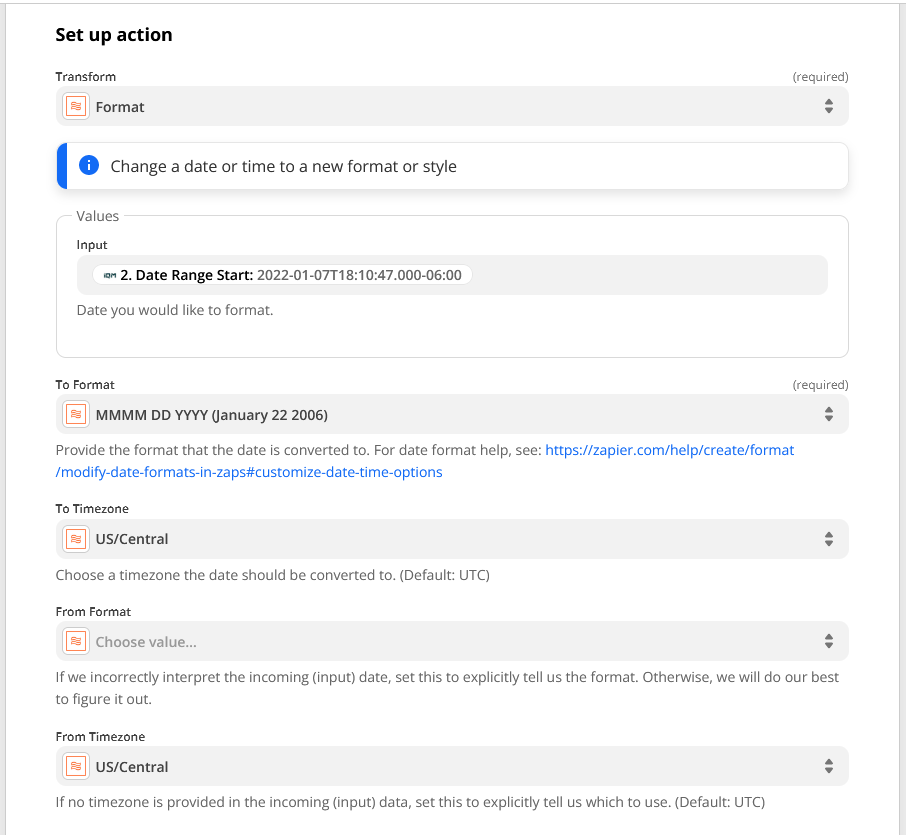
Configure the Formatter
In the Set up action section:
- Input: Map the Date Range Start output field from IQM Reports into the Input field
- To Format: Choose an output format from the dropdown to convert the input to
- From Timezone: Choose the same timezone as you selected in IQM Reports
- To Timezone: Choose the same timezone to keep it consistent, or choose a different timezone to convert
- From Format: Choose the Custom tab and enter:
YYYY-MM-DDTHH:mm:ss.SSSSZ
To convert the Date Range Start time to a different timezone, choose the same timezone in the From Timezone dropdown as in IQM Reports, then choose the timezone to convert to in the To Timezone dropdown.
Click Continue and test the action to verify that the formatter converts the date correctly.

Use the Formatted Date
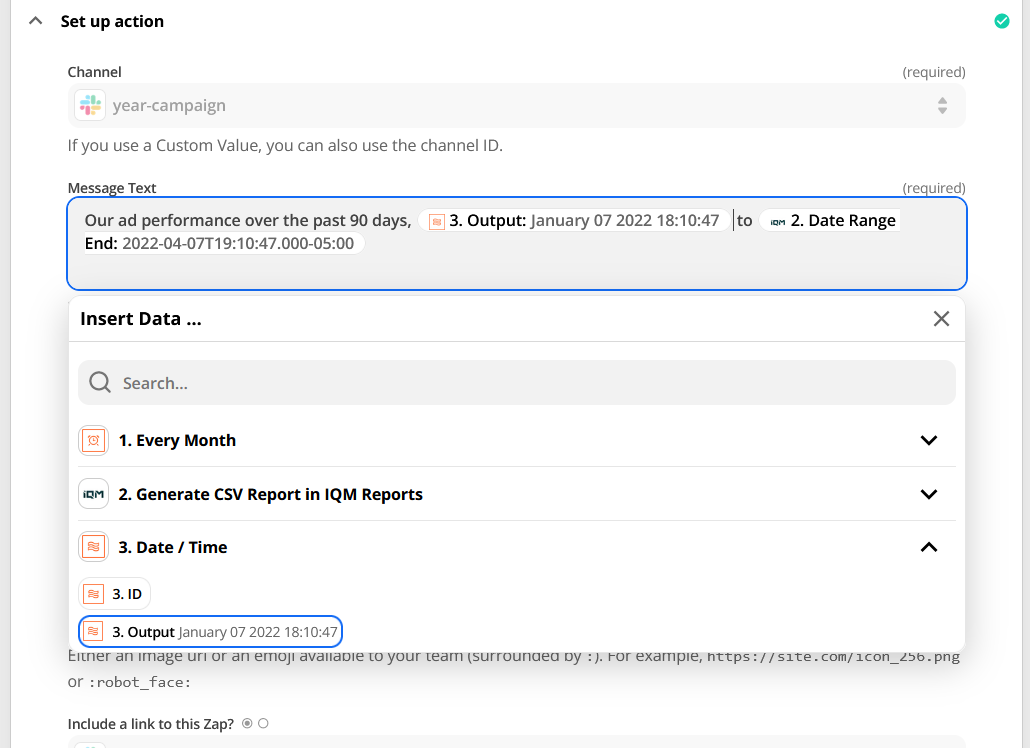
After testing the Formatter action:
- Navigate back to the Slack action and open the Set up action section
- Map the formatted date output by the Formatter action into fields in the Slack action, such as the message
- Repeat the above steps for IQM Reports' Date Range End output field as well
After testing the final action and verifying the expected results, turn on the Zap by clicking the Turn on Zap button or by clicking the switch in the upper right corner.
For more information about datetime patterns, see Zapier's Datetime Formatting Guide.
Key Features
- 6,000+ app connections: Connect IQM with virtually any tool in your stack
- No-code automation: Build workflows without writing any code
- Triggers and actions: Automate based on IQM events and data
- Multi-step workflows: Create complex automations with multiple steps
Popular Zaps
- Campaign notifications: Get Slack or email alerts when Campaigns hit milestones
- Data sync: Automatically update spreadsheets with Campaign performance
- CRM updates: Sync Campaign data to your CRM system
- Report distribution: Automatically send reports to stakeholders
Additional Resources
- Zapier - Zapier automation platform
- Zapier's Trigger Documentation - Learn about Zap triggers
- Zapier's Datetime Documentation - Datetime modifiers guide
- Zapier's Datetime Formatting Guide - Format date and time values
- IQM Reports on Zapier - View available integrations and triggers
- Formatter by Zapier Documentation - Learn about data transformation
- IQM Partnerships - View all IQM partners
Use Cases
- Automated alerts: Notify teams when budgets are depleted or goals are met
- Data warehousing: Push IQM data to your data warehouse automatically
- Cross-team collaboration: Share Campaign updates across departments
- Custom integrations: Build unique workflows for your specific needs